¶ Pages
Your WCS site is made up of individual pages that can each display text, images, multimedia content, anything that you can think of.
Pages are primarily accessed via the Main Navigation Menu - some pages are already created by WCS such as the Homepage, New, Contact, Members Area, and Settings pages,
but you can easily create your own pages to display any information you'd like.
Page operations such as Adding/Editing and Re-ordering are done through the Page Hierarchy Editor.
¶ Page Hierarchy Editor
The Page Hierarchy Editor is responsible for managing all of your user-created pages and can be accessed via the Main Navigation Menu by going to Settings > Pages
The main layout shows a diagram of how pages on your site are structured. Pages can have Child-Pages underneath them in the structure (which will be indented relative to the parent),
with the Parent-Pages acting as a container affecting how the pages are displayed in Menus.
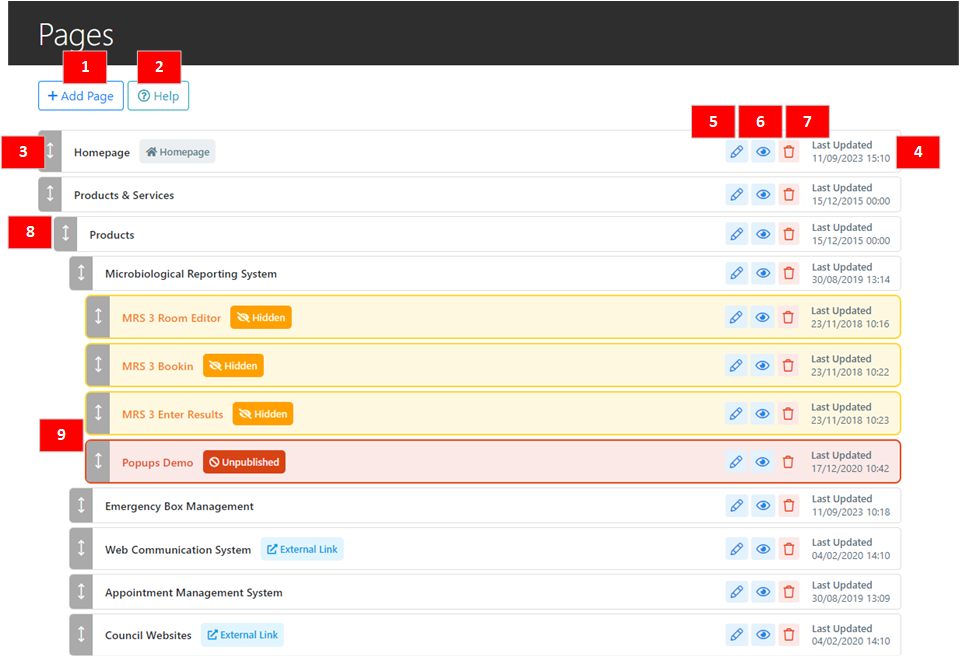
-
Add Page
Add a New Page to your website. -
Help
Brings up the relevant Help Section from WCS's online documentation. -
Positioning Tab
Click and drag to reposition the page in the hierarchy. This will also affect the order pages appear on the Main Navigation Menu.
See Reordering Pages -
Last Updated
The date and time the page was last updated. Hover over this with your mouse cursor to see additional details. -
Edit Page
Edit the relevant page's Settings and Content. -
View Live Page
Click to view how the page currently displays on the site. -
Delete Page
Deletes the relevant page.
Note: If Page has any other pages beneath it in the hierarchy, these will also be deleted using this operation!
- Child-Pages
Pages positioned underneath another will create another level in the Menu, and will only be shown if the parent is clicked or hovered over.
See Page Relationships
Note: The parent page will not have any content and only serves as a container for the child pages.
- Hidden/Unpublished Pages
Pages in Orange are designated as 'Hidden' and will not be shown in the Main Navigation Menu.
Pages in Red are Unpublished, and will not be viewable until they have been Published.
¶ Reordering Pages
Pages can easily be reordered within the Page Hierarchy Editor. This primarily affects how your site's menus are displayed.
Pages can be moved by clicking and dragging the Move icon ![]() displayed on the left of each page's entry in the Page Hierarchy Editor.
displayed on the left of each page's entry in the Page Hierarchy Editor.
When moving a page you will see a Green outline of where the Page will be moved to once you release your mouse.

Changing the order of pages like this affects the way your pages will appear in your site's Main Navigation Menu.
Entries higher up the hierarchy will appear in the menu before entries lower down.

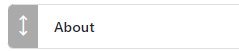
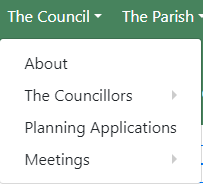
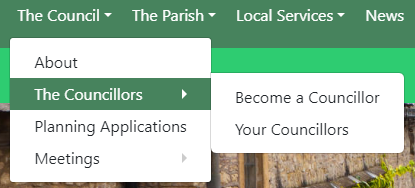
In the example above, the About page is ordered before the Your Councillors page, and so their entries in the Main Navigation Menu will display like this:

Whereas if we reverse the order:

This change in order will also be reflected in the Main Navigation Menu:

Note: The Homepage will always be first in the menu, regardless of where it is moved, and WCS generated pages such as the News, Members Area, Contact and Settings pages, cannot be moved from their assigned positions.
¶ Page Relationships
In addition to being able to be Reordered, Pages can also be placed inside others within the Page Hierarchy Editor.
This allows you to group related pages together, and aids in creating a logical menu structure for your website.
- Placing a Page inside another is very similar to Reordering pages, however when clicking + dragging the page, you must position it directly over and to the right of the page you want to place it inside of.
The Green highlight where your page will be placed will indent slightly, indicating that it will go inside the Parent Page:

When the mouse is released, the page will be placed inside the Parent Page:

- After refreshing the page, you will notice the Parent page's entry in the Main Navigation Menu change:

The Downward Arrow icon  indicates that there are more pages inside. Clicking the Menu Link will make them visible:
- Child Pages themselves can have further children added into them which will create more sub-menus in the Main Navigation Menu.
For example, the following structure:
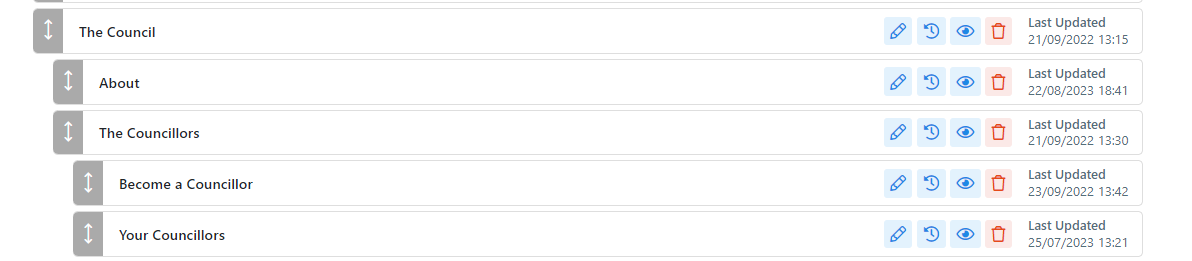
Would appear in the Main Navigation Menu as such:
- When moving Pages with children in the Page Hierarchy Editor, they will all be moved as one, the children will always follow the parent:

¶ Adding a Page
- In the Main Navigation Menu go to Settings > Pages
This will bring up the Page Hierarchy Editor which displays all of the User-Created pages that are part of your organisation's website:
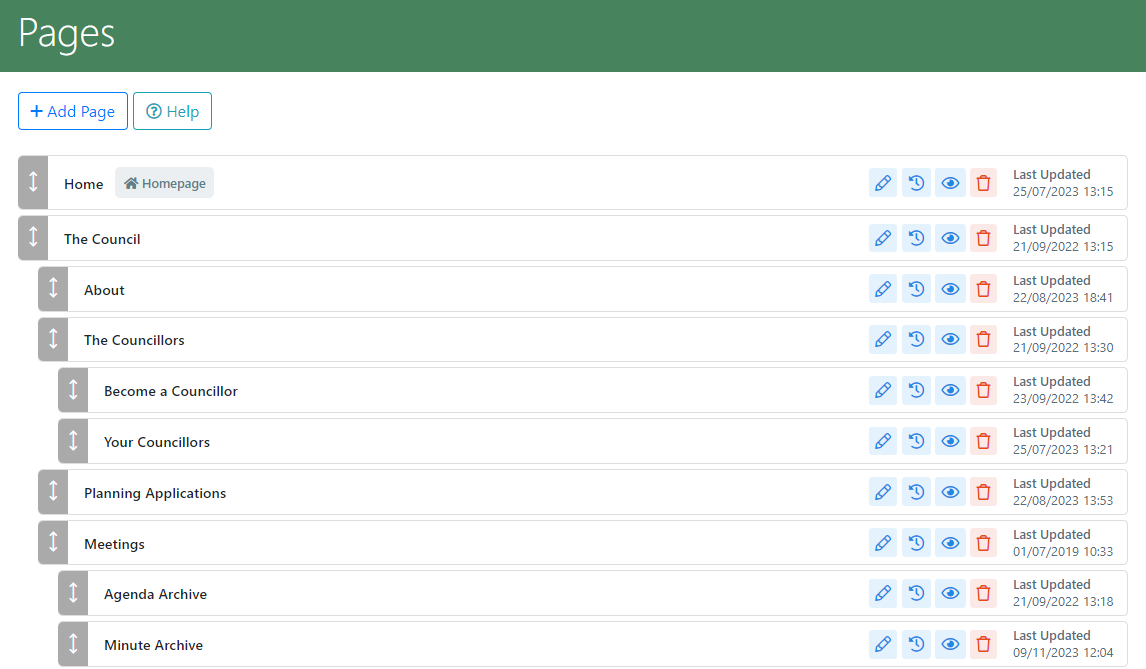
- Click the + Add Page button
 that appears above the list of pages, which will take you to a form where you will enter details of the new Page.
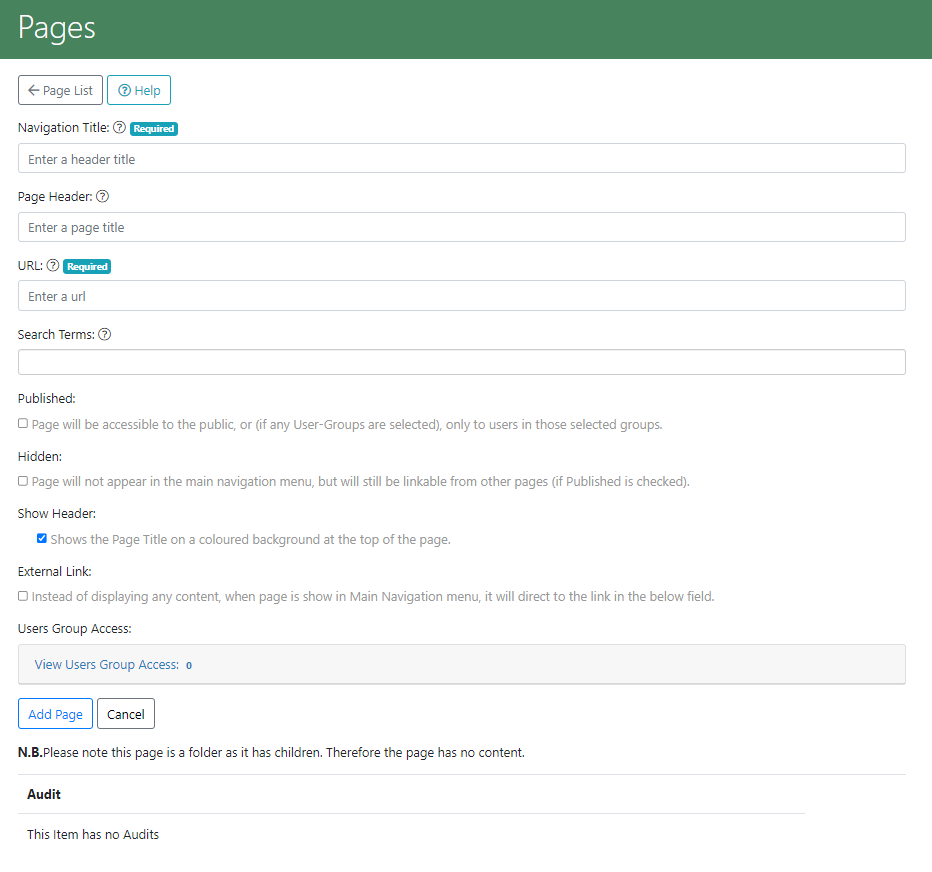
Navigation Title
This is the name of the Page as it will be displayed in the Main Navigation Menu.
Page Header
This is the text that will be displayed at the very top of the page before your main content.
If you do not enter anything in this field, it will default to the Navigation Title.
This will also be the text that show up in the tabs of your Web Browser (Internet Explorer, Chrome, Firefox .etc):

Note: This will only display if the Show Header option (see below) is checked.
URL
This is the web address that the page will be accessible from in a user's web browser.
It will take the form yoursite.co.uk/page-url (substitute 'yoursite.co.uk' for your organisation's website address)
For example, if we were to enter 'wcs help section' into this field. This page would be available at:
yoursite.co.uk/wcs-help-section:

Note: Spaces are not allowed in web addresses, so any that you enter into this field will be replaced with hyphens (-)
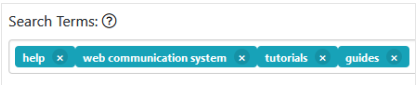
Search Terms
Enter any keywords of phrases here to help users find this page when using your built-in Site Search feature, alongside online search services such as Google and Bing.
Each term should be separated by a comma:

Note: This section can be left blank if desired.
Published
If this option is checked, the page will be marked as 'Published', and will be added to the Main Navigation Menu unless 'Hidden' (see below) is checked.
Hidden
If this option is checked, the page will not show up in the Main Navigation Menu although it will still be accessible to anyone who has the web address.
Show Header
If this option is checked, the Page Header (see above) will be visible.
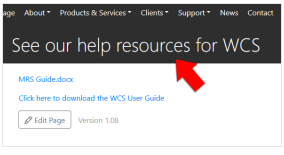
External Link
If this option is checked, you will be able to send users to an external website if they try and access this page.
External Link URL (only visible if External Link option is checked)
The external web address that users will be taken to if they try and access this page.
User Group Access
Control which User Groups are able to access the page.
Users who are not part of the Groups selected here will be denied access.
-
Once the Page details have been entered, click the Add Page button
 and your page will be added to the Page Hierarchy, and the Main Navigation Menu (unless Hidden was selected in the options above).
 -
Once the Page has been created, the next step will be to Add Content to it.
¶ Editing / Adding Content to a Page
Once a page has been added successfully, and that page does not have any children beneath it, then Content can then be added to it.
-
In the Page Hierarchy view find the page that needs content adding (if you have just added a new page, this will be at the very bottom of the hierarchy).
-
On the right-hand side of the Page's Hierarchy entry, click on the Edit Page icon
 which will bring up a form almost identical to that of Adding a Page, with the addition of a few extra fields:
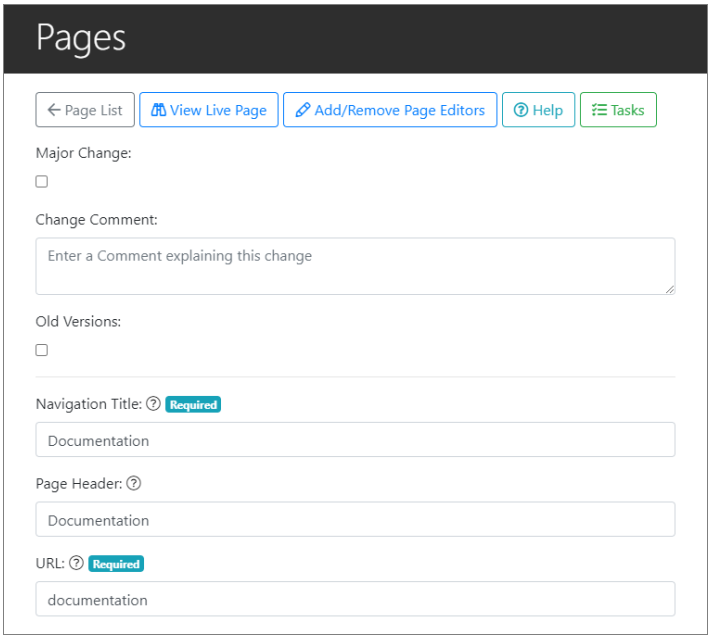
Major Change (Only visible if Enhanced Page Versions enabled)
Select if this is a major change to the page content. This will increment the Page Version Count by 1.0.
If this isn't option isn't selected. Any changes to the page will increment the Page Version Count by 0.01.
Change Comment (Only visible if Enhanced Page Versions enabled)
The reason for the change to the page.
Old Versions (Only visible if Enhanced Page Versions enabled)
If this option is select, visitors to the page will see a drop down menu at the bottom, and they can choose to select and view older versions of the page.

Navigation Title
This is the name of the Page as it will be displayed in the Main Navigation Menu.
Page Header
This is the text that will be displayed at the very top of the page before your main content.
If you do not enter anything in this field, it will default to the Navigation Title.
This will also be the text that show up in the tabs of you web Browser (Internet Explorer, Chrome, Firefox .etc):

Note: This will only display if the Show Header option (see below) is checked.
URL
This is the web address that the page will be accessible from in a user's web browser.
It will take the form yoursite.co.uk/page-url (substitute 'yoursite.co.uk' for your organisation's website address)
For example, if we were to enter 'wcs help section' into this field. This page would be available at:
yoursite.co.uk/wcs-help-section:

Note: Spaces are not allowed in web addresses, so any that you enter into this field will be replaced with hyphens (-).
Search Terms
Enter any keywords of phrases here to help users find this page when using your built-in Site Search feature, alongside online search services such as Google and Bing.
Each term should be separated by a comma:
Note: This section can be left blank if desired.
Content
Enter the page content here using WCS's built-in Content Editor.
Show Contents Section
This will add a menu to the right hand side of the page (at the top on mobile view) which will enable the user to go directly to contents of a section within a page.
News
Select if you want your site's latest News Stories to be displayed in a menu, down the right-hand side of the page.
Page Add-Ons
Display one of your Page-Add-Ons on the right-hand side of the page.
Page Footer
Display one of your Page-Add-Ons beneath your pages main content.
Published
If this option is checked, the page will be marked as 'Published', and will be added to the Main Navigation Menu unless 'Hidden' (see below) is checked.
Hidden
If this option is checked, the page will not show up in the Main Navigation Menu although it will still be accessible to anyone who has the web address.
Show Header
If this option is checked, the Page Header (see above) will be visible.
External Link
If this option is checked, you will be able to send users to an external website if they try and access this page.
External Link URL (only visible if External Link option is checked)
The external web address that users will be taken to if they try and access this page.
Header Colour
Change the colour for the Title Header of this particular page.
Page-Add-Ons Colour
Change the colour for the Page-Add-Ons if any were one was added through the previous field.
User Group Access
Control which User Groups are able to access the page.
Users who are not part of the Groups selected here will be denied access.
When all necessary information has been filled in, click the Save Page button  to save all of your changes and you should receive confirmation that the page has been saved:

Or alternatively, if you want to save the page as a draft to come back to later, click the Preview & Save as Draft button 
¶ Page Drafts
When editing the content of a page you may wish to Save your progress, and come back later to finish it off before publishing.
-
When you have got up to the point at which you want to save your work In the Page Editor, scroll down and after the User Group Access option, should be the Preview & Save as Draft button
next to the options to Save Page and Cancel. -
This will then bring up a preview of how your page will look with what you have input so far:
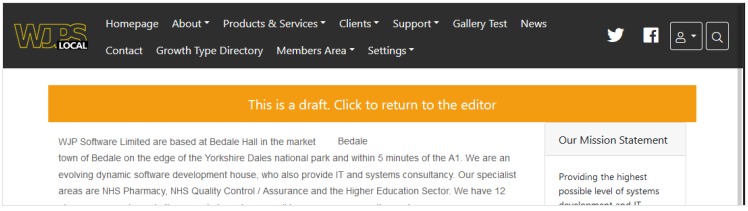
Your work has been saved at this point.
You can click on the Orange banner, to return to the Page Editor and continue working, or just leave the page.
Note: This page is a preview only and will not have been published on your website.
- When you next come to Edit the page, all fields will be blank, but you will see another at the top of the page which can be clicked to access your saved draft:

Which you can then work on further before Publishing, or saving as another Draft.
- If you wish to discard the draft, at the stage above when the Red banner appears, simply click the Clear Draft button
 on the row below, and this will delete it.
¶ Page Versions
WCS keeps a thorough history for each of the pages you create for your website - whenever you change a page's settings or content, a backup is automatically made and can be viewed and restored at any point.
¶ Viewing and Restoring a Previous Page Version
- A Page's Version History can be viewed by navigating to the Page Hierarchy Editor and clicking the View Previous Versions icon
 on the right-hand side of the relevant page entry
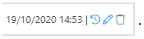
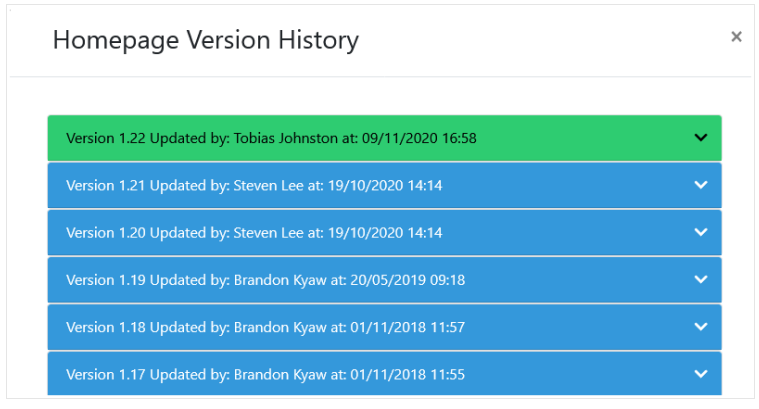
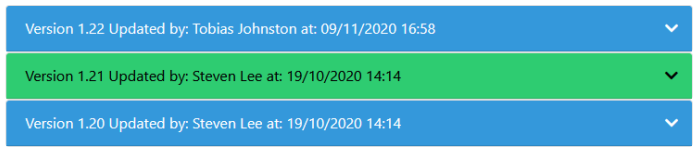
This will bring up a list of the pages previous versions detailing who made the changes, and when they were made.
The current Page Version is highlighted in Green, while previous versions will be coloured Blue
- You can view more details by clicking the downward facing arrow
 to the right-hand side of each entry, which will expand and show the version's textual content, along with it's title at the point in time.
If a Version Comment was entered* this will also be displayed:
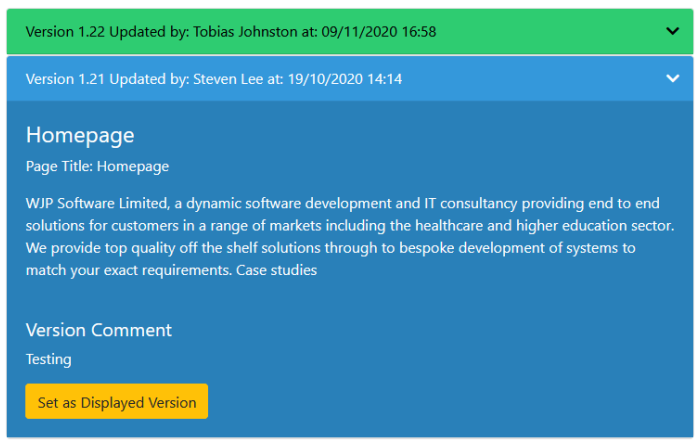
*This is an Additional Feature for WCS and is not enabled by default. See Enhanced Page Versions for more details.
- To restore the selected version, click on the Set as Displayed Version button
 .
.
This will instantly display the selected version to your audience.
Notice that the older version will now be highlighted in Green, indicated it is now the Active version, however the newer version is still listed, and can also be restored if desired:
¶ Enhanced Page Versions

Enhanced Page Versions is an optional extension to WCS's existing Page Versions feature which allows for some additional flexibility for Version Control when editing pages.
- When Enhanced Page Versions is enabled, extra fields will appear at the top of the Page Editor when editing a Page's Content:

Major Change: Ordinarily when a page is edited, it's Version Number (which will display when Viewing or Restoring a Previous Page Version, or at the bottom of the page itself) will increment by 0.01, indicating a minor change (spelling corrections, grammar .etc), whereas if this option is checked, it will increment the Page Version by 1.0. indicating a major change. You may wish to check this if the page has undergone a complete rewrite for example.
Change Comment: A comment justifying the need for the change and what was done should be entered here.
Old Versions: If this option is ticked, a drop-down menu, visible to your audience will appear at the bottom of the page itself, and allow them to select and view all of the previous versions of the page:

Note: The 'Recommended' version will either be the latest, or that which you have specifically set as the 'Displayed Version' in the Version History menu.
¶ Content Editor
The Content Editor is the main tool used to author pages for your WCS site.
With it you can add and modify Text, Images, Events, Galleries and other rich content to your Pages with an interface similar to Microsoft Word and other Word Processors.
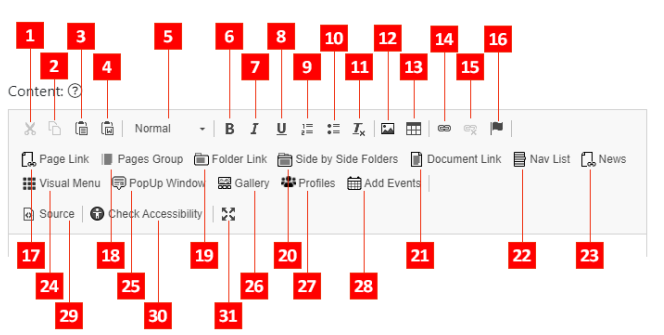
Note: Depending on your device, the above Editor Controls may appear as icons only.
-
Cut (Ctrl + X)
-
Copy (Ctrl + C)
-
Paste (Ctrl + V)
-
Paste From Word: This tool will bring up a window in which you can paste content from Microsoft Word, and retain better formatting than the regular Paste option.
-
Paragraph Format: Select the text style for the current paragraph.
-
Bold Text
-
Italic Text
-
Underline Text
-
Insert/Remove Numbered List
-
Insert/Remove List
-
Remove all Text Formatting
-
Add an Image: This will bring up a window in which you can upload an image from your device to insert into the Editor.
-
Insert Table
-
Insert Link: Using this option you can add a link to another website, an anchor tag on the same page, or an email address.
-
Remove Link
-
Insert an Anchor Tag: This will allow you to insert an Anchor tag at the specified point in the page, that can be linked to using the Insert Link option.
This is useful for linking to a specific place on the same page. -
Page Link: Use this option to select another page of your WCS site to link to.
-
Pages Group: Add a group of pages to the current page (if any groups have been created).
-
Folder Link: Add a link to a folder of documents (See: Adding a Folder of Document to a Page).
-
Side by Side Folders: Similar to the Folder Link option, but with the ability to add 2 folders, side-by-side.
-
Document Link: Link directly to a document within your Documents section (See: Adding a Document to Your Page).
-
Nav List: Allows you to select Pages from your site, that will be linked to from a stylised Navigation Menu inserted into the Page.
-
News: Will add your site's last 3 News Stories into your Page.
-
Visual Menu
-
PopUp Window: Adds a link to open one the Pop-Up Windows created in the Popups section.
-
Gallery: Add a Photo Gallery from the Galleries section into the Page. (See: Adding a Gallery to a Page).
-
Profiles: Add Member Profiles created in the Profiles section to the Page.
-
Add Events: Add details of upcoming events entered in the Events section.
-
Source: Shows the Raw code of the Page which you can then edit (Advanced Users Only!)
-
Check Accessibility: Will scan your Page Content for any issues that would affect the Accessibility of your site.
-
Full-Screen Mode: Will make the Content Editor full-screen on your browser, so you can concentrate with no distractions!
¶ Drag & Drop Images & Documents
You can add images or documents to a page by dragging them from a file on your computer onto the page while in the page editor screen.
Simply drag the item to where you would like to place it on the screen and let go for it to 'drop' into place.
¶ Assigning / Removing Page Editors
Any Users can be added as 'Page Editors' for specific Pages.
These Users then have the ability to Edit the Content of a Page, but cannot Add/Delete/Move Pages or have access to any other Administrative functions (unless assigned as such in their User Settings).
Page Editors can be Assigned using the following process:
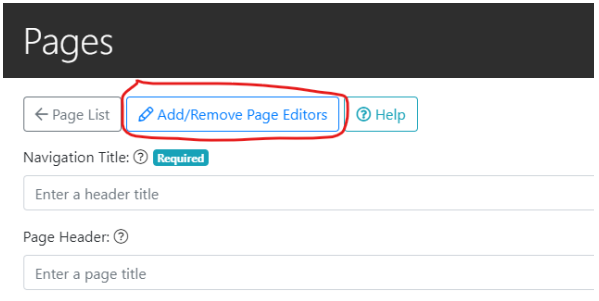
- When Editing a Page, click the top Add/Remove Page Editors button
 above the Page Add/Edit form:
- Start typing the Username, or Full Name of the User you wish to add as a Page Editor and relevant results will be displayed as you type.
Any Site Administrators will already be listed as Page Editors in the Grey list of Active Editors below:
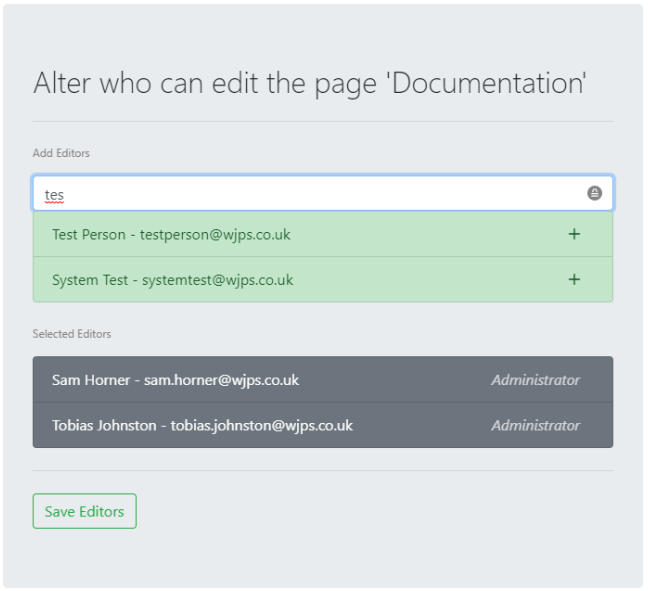
- Click on any of the results below the search field, to add them to the 'Selected Editors' list below:

- You can search for, and add more Page Editors to this Page, or if you have finished adding Editors, click the Save Editors button
 to complete the process.
Note: Page Editors can be removed by clicking the 'X' button, within the lower Selected Editors section then clicking the Save Editors button.
¶ Editing Pages (For Page Editors)
Users who have been assigned as Page Editors by a Site Administrator will be able to edit the Content of their assigned Pages.
To Edit an Assigned Page:
- Log In and access the Members Area:

You should have access to the new Edit Page Sub-menu which will list all of your assigned Pages that they will be able to Edit:
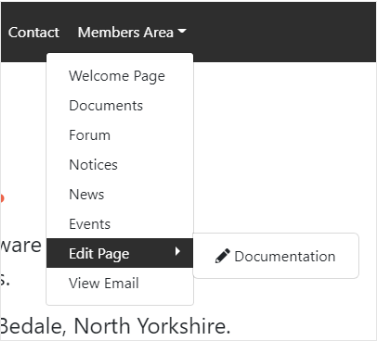
- Click on the assigned Page which you would like to Edit and you will have access to the Content Editor
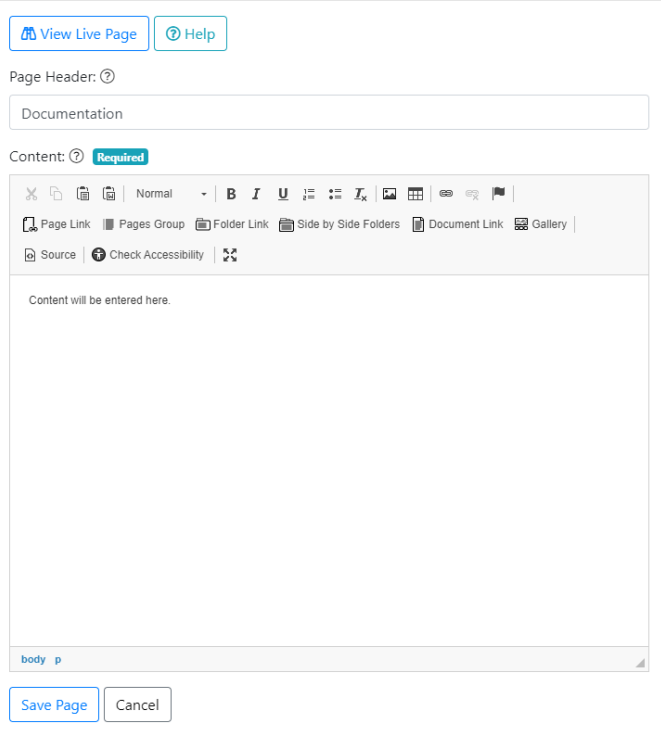
- Enter the Content of the Page into the Editor and click the Save Page button
