¶ Documents
There are two ways of handling documents.
Option One - available to Lite, Standard and Pro users
Option Two - available to ONLY Standard and Pro users.
¶ Option One - Drag & Drop (All Users)
The simplist way of loading a document onto a page is to drag and drop it from your computers file system.
The video below shows that when you are in the page editor mode you can simply drag a file from your computer into the 'content' box and let go and it will drop in the file where you need it.
¶ Option Two - WCS Document Management System (Standard & Pro System)
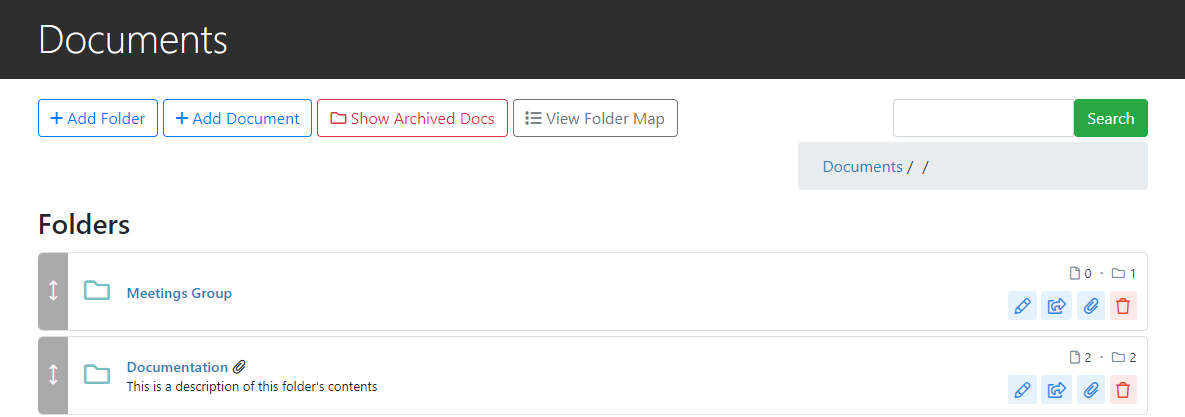
The Documents section allows documents such as Microsoft Word Files, PDFs, Images .etc to be shared amongst groups of registered members, or even with the general public.
The structure is exactly like the traditional file system on your computer where documents can be placed inside folders for ease of organisation.
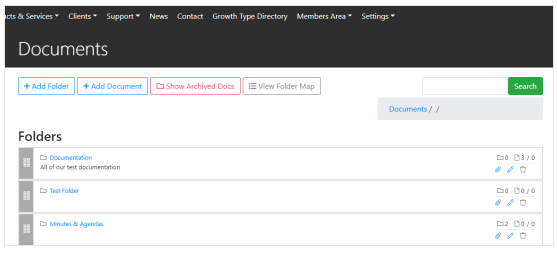
It can be accessed via the Main Navigation Menu and selecting Members Area > Documents
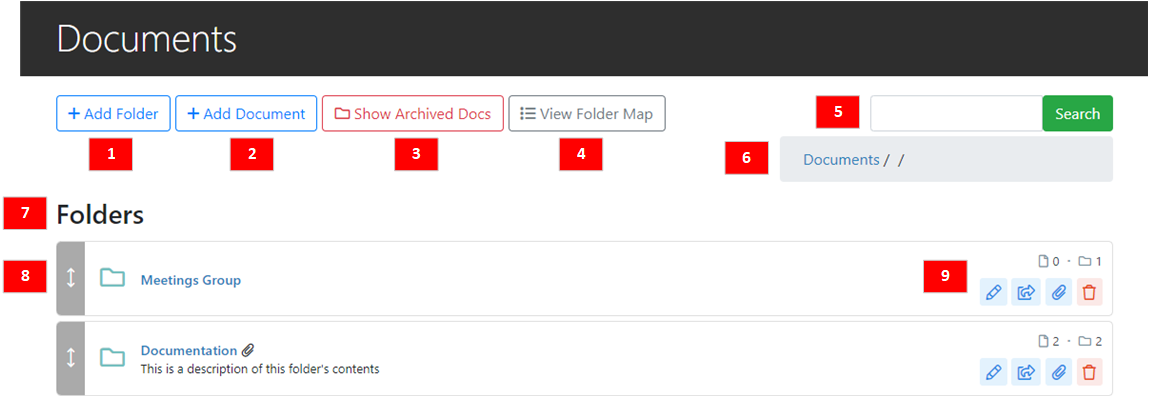
- Add Folder: Adds a new folder to the current level within which documents can be placed, or further folders for more precise organisation.
- Add Document: Brings up the page to add a document to the current level.
- Show/Hide Archived Docs: Shows (or hides) archived documents.
- View Folder Map: Shows an overview of your overall folder and document structure.
- Search: Search for a specific document within the whole of the 'Documents' section.
- Level: Shows the current level which documents and folders will be added to.
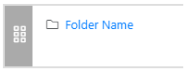
- Folders: Shows the folders on the current level.
- Document Folder: Example of a folder on the current level. These can be reordered by clicking and dragging the Grey area to the left.
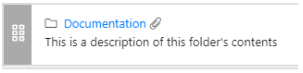
If the folder has been linked to directly from a page within WCS, this will be represented by a paperclip icon next to the folder name. - Folder Details and Operations: Shows details about the documents within the folder, and operations that can be performed on it.
¶ Document & Folder Operations
On the main Documents screen, a number of operations can be performed using the buttons displayed on the right of each entry.
These operations vary depending on whether a document or a folder is shown:
Folder Operations
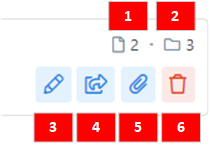
- Number of documents within this folder
- Number of folders within this folder
- Edit Folder
- Share Folder
- Show which site pages link to this folder
- Delete Folder
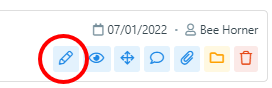
Document Operations
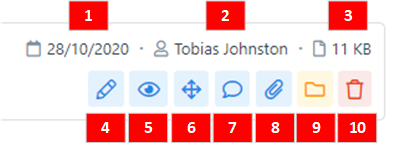
- Date document was added to the site. An asterisk (*) after the date denotes that the file was modified.
- User who added the document
- Document file size
- Edit Document
- See the registered users who have viewed the document
- Move the document to another location (note that documents and folders cannot be dragged and dropped into each other as in Windows file explorer, they must be moved using this button)
- Document discussion
- Show which site pages link to this document
- Archive document
- Delete document
¶ Archiving Documents
On occasion, you may have documents that are no longer relevant and that you wish to hide from your day-to-day folder structure, but still have access to for future reference.
Rather than Deleting the documents which will remove them entirely, they can instead be Archived and will remain hidden in a special section that you can choose to view at any time.
- To archive a document, navigate in the Documents section to the document that you wish to archive.

Note- that documents must be archived on an individual basis, folders cannot be archived and instead each document within them must be archived individually.
- In the Document Operations section of the document's listing, select the 'Archive Document' Icon
 and you will be asked to confirm the archival operation:

Clicking 'OK' will archive the documents and they will have disappeared from the main folder view, indicating that they have been archived successfully.
- Archived documents can be viewed in the Documents section by clicking the Show Archived Docs button
 above the main file/folder view:
This will change the viewing mode to show only Archived documents present within the current folder.
A banner will appear at the top of the screen notifying you that only Archived documents are now visible:

And you will notice the Show Archived Docs button change to Show Un-Archived Docs  .
.
You can then click the button again to switch the view back to your current documents.
Note: If you have added any Document Folders into pages on your site that contain Archived documents, the Archived files will no longer be listed, however any Singular Document Files you have added will still be active and downloadable.
¶ Adding Documents to Your Site
Documents can be added to your website from the Documents section.
-
Navigate to the folder you want to add the document to and click the Add Document button
 above the main file view.
 -
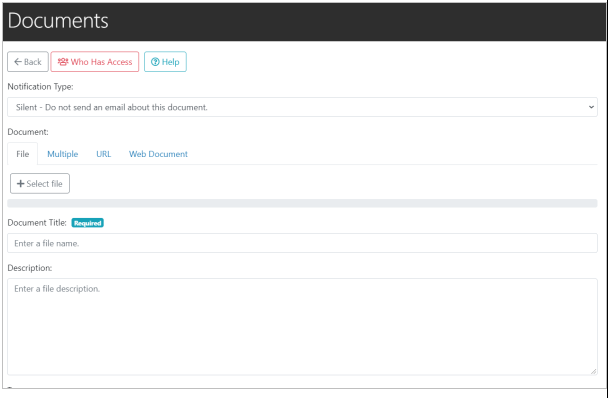
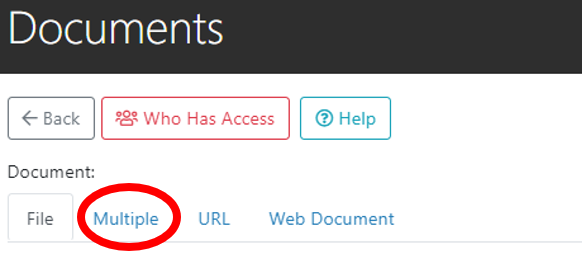
This will bring up a page where you will add your document and enter its details:
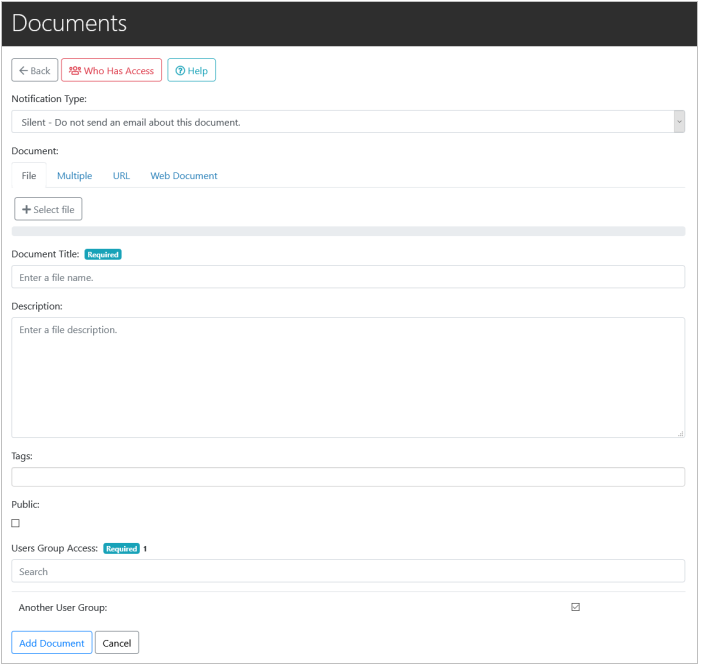
Notification Type
You can choose to send an email notification to everyone who will be allowed access to this document, letting them know it is now available.
Document
Here you can upload your document from your computer, to your WCS website.
You can choose whether to upload a single file, multiple files, or simply link to a file hosted on an external website.
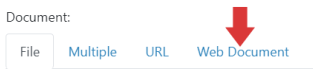
Depending on whether File, Multiple, URL, or Web Document is selected, the following options may change.
Select File
Once clicked, this will bring up a file selector, and you can select the file(s) on your computer that you want to add to your website.
Then click 'Open' and they will be uploaded.
Document Title
The title of your document and how it will be displayed in folders. This is filled in automatically with the filename when you select a file in the previous field, although you can override it if you wish.
Description
A longer description of what the document contains. This is not mandatory and can be left blank.
Tags
Keywords to describe the contents of your document, each separated by a comma. These are used to improve the results from your website's Search function.
For example, a document containing council minutes could be tagged with 'Minutes' and 'Meeting', which would lead to appearing in search results if a user enters these terms.
Public
If this checkbox is ticked, the document will be available to the general public if inserted into a page.
Users Group Access
Select which of your User Groups are allowed to access this file.
You can check exactly which Users have access by click the Who Has Access button  at the top of the page.
This will show you the members of all the User Groups who currently have permission to view this file.
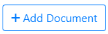
- Click the Add Document button
 and you should receive confirmation that your document has been added:

¶ Adding a Web Document to Your Site
Web Documents can be viewed by a user in their Web Browser without having to download any additional files (e.g. Word, or Acrobat), they are in HTML, meaning that anyone with accessability needs has the option to change things like the background colour or text size- therefore they are the gold standard of accessability.
These should be your preferred means of creating documents for your users, as they are in-line with UK Government guidelines on ensuring documents are accessible to as many users as possible, without the need for additional software.
Web Documents can be created within WCS using the same Content Editor used to create Pages.
-
Within the Documents section, navigate to the Folder in which you wish to create your Web Document.
-
Click the Add Document button
 above the main file view which will bring up a form to fill in the details of your document:
- Underneath the 'Document:' form option, select the 'Web Document' tab to create a new Web Document.
-
Enter your Document Content within the editor (note: that you can easily copy + paste content from Microsoft Word into the editor), and fill in the other required fields before clicking the Add Document button
 below the form to complete the process.
 -
If you navigate to the relevant folder within the Documents section, your document should now appear with a Globe Icon , indicating that it is a Web Document.
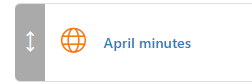
Clicking the title will take you to the Content of the Document itself.
¶ Editing a Web Document
To edit a Web Document, find the document in the documents list, and click the Edit icon.
This will take you to the document form, where you can edit or update any content, which will then be updated everywhere the document is displayed, and for anyone with a link to the document.
¶ Upload Multiple
You can add multiple documents at one time to your WCS site, either to a folder or just into the documents section.
- Click the + Add Document button, then select the ‘multiple’ option.
- From here you can click the + Select Files button and upload your documents as normal. The documents will look like this on the page.
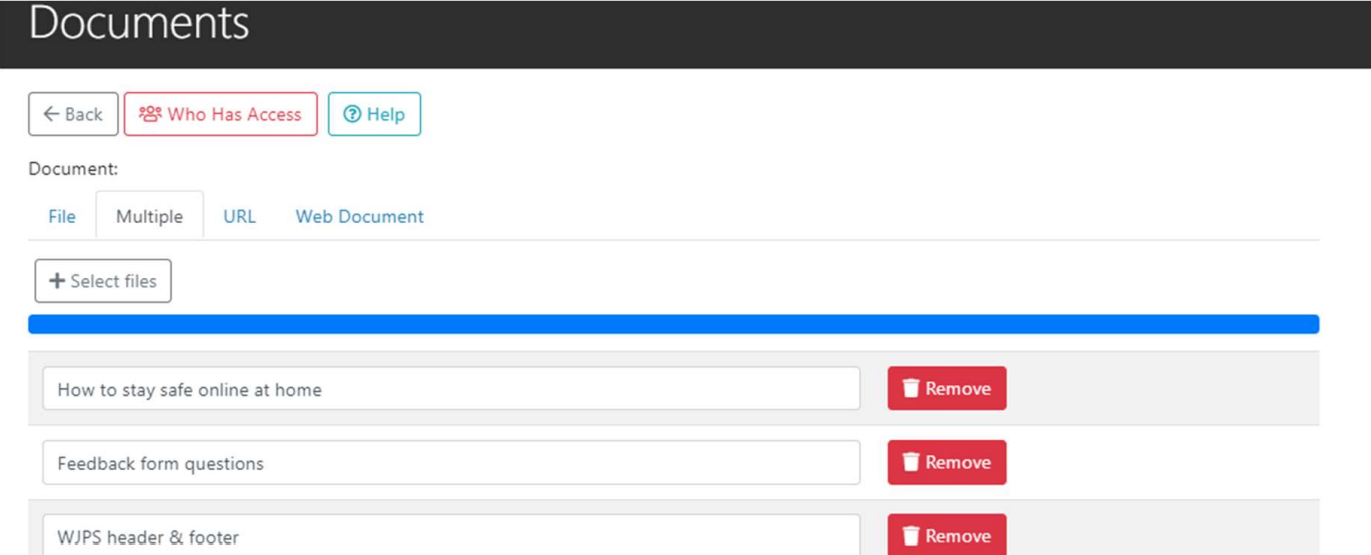
Once you have uploaded all your documents, click Add Documents button  . A green banner will display notifying you that the documents have saved successfully.
¶ Adding a Folder to Your Site
Folders in which documents can be placed, can be added to your website from the Documents section
-
Navigate within the Documents section to where you would like your folder to be created.
Just like on your computer, folders can be placed within other folders and there is no limit to how deeply they can be nested.
To add a new folder, click the Add Folder button above the main file view.
 -
This will bring up a page where you can enter the details of the folder you wish to create:
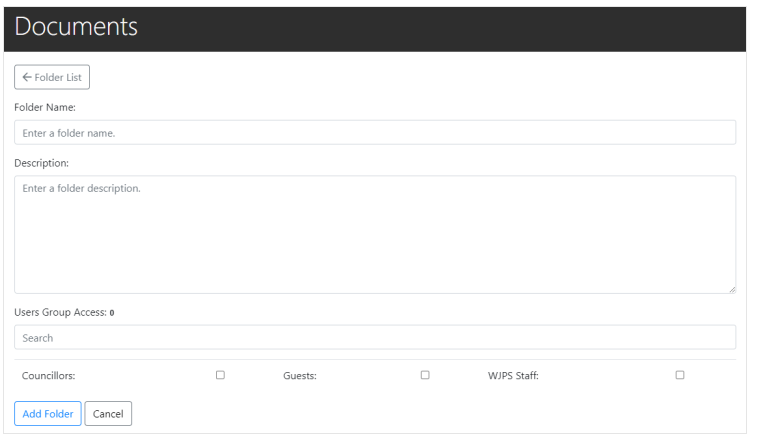
Folder Name
The name of the folder as it will appear in the Documents section
Description (optional)
A description of what the folder contains.
This is displayed underneath the Folder Name in the Documents section
Users Group Access
Select which User Groups have access to this folder. Click the checkbox next to each group you would like to have access.
If you have many User Groups set up, you may find it easier to search for particular groups using the search field here.
- Click the Add Folder button
 and you should receive confirmation that your folder has been added:

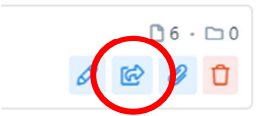
¶ Sharing a Folder of Documents
Sharing a folder will send a notification email to everyone within the User Group you gave access too when creating the folder.
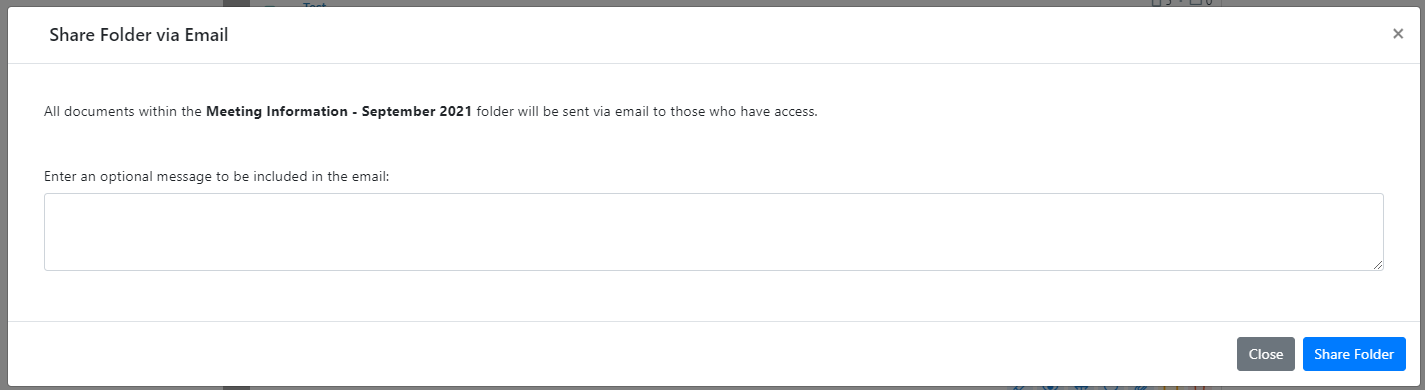
To do this click the share button next to the folder you wish to share, you will then get a prompt to add a message to the email if you wish, then click the share folder button to confirm the send.
Once the folder has been shared, members of the User Group selected will recieve an email linking them to the documents. Everyone in the User Group selected will receive an email with the list of documents, and will be prompted to log in to the site before viewing.
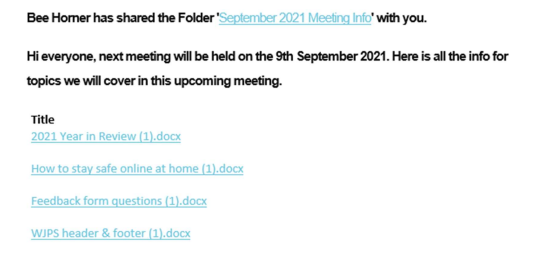
When you click any of the document links in this email, if you’re not already logged in to the site, it will send you to the site log in page, where you enter your details to log in. The document will then be automatically downloaded onto your computer for you to read.
If you click the first link in the email, the folder link, (In this example the link titled ‘September 2021 Minutes Info’) you will be taken to the site log in page, then automatically redirected to the folder of documents on the site, displayed like so:

¶ Adding a Document to a Page
- Firstly, ensure that the document(s) that you wish to link to are available in WCS by going to:
Members Area > Documents on your site's top navigation menu.
See the main 'Documents' section as for a guide on how to add a document to your WCS site.

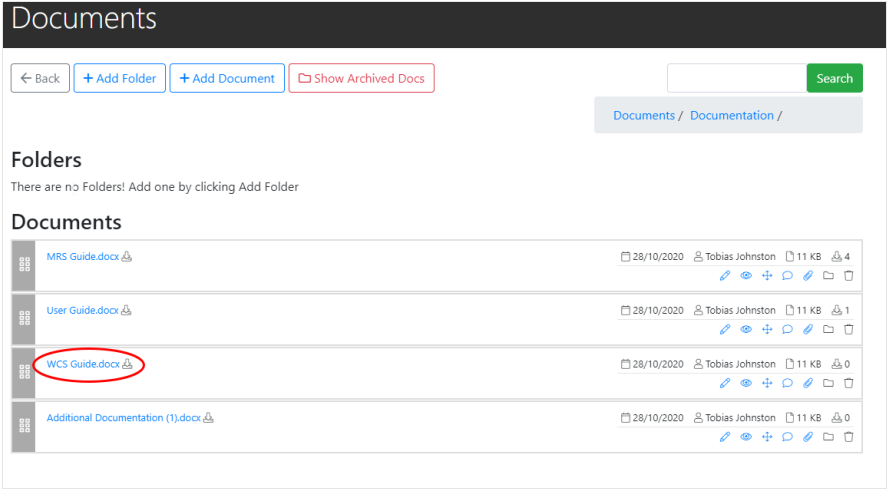
In this instance we will link to the file 'WCS Guide.docx' which is inside a folder called 'Documentation' folder within our main 'Documents' section:
- Under the Support menu we've created a New Page called 'WCS Help' and we'll add the link to our 'WCS Guide' file on here.

Once we've clicked onto the 'WCS Help' page, we can go to 'Edit Page'.
And in the pages content Editor click on 'Document Link'

This will bring up a window in which we can select the folder which contains the document (in this case, 'Documentation') 'WCS Help Document':
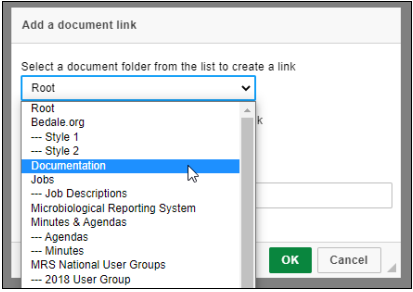
And in the next dropdown menu, the folder's contents will be displayed, including the relevant file:
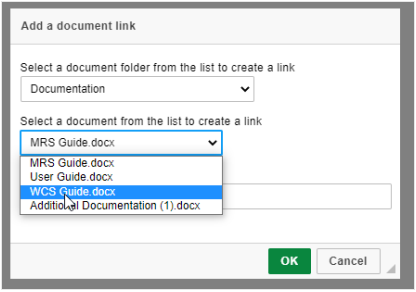
The link label is the text that the link to our document will be displayed as.
In this example, we will change this to 'Click here to download the WCS User Guide'.
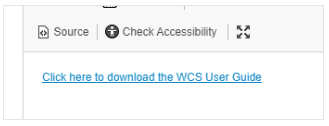
And if we save our page, and view it, the link to our document is visible on the page:

Clicking it will download the document file to your computer.
Note: that in order for this file to be downloadable to users without an account, it must have been set to 'Public' when added to the Documents section, otherwise they will be prompted to log in to download the document.
¶ Adding a Folder of Documents to a Page
- Firstly, ensure that the document(s) that you wish to link to are available in WCS by going to: Members Area > Documents

You can link to individual documents, or even all of the documents within a particular folder.
In this example, we have a folder called ‘Documentation’ which contains 3 Word documents which we will then link to through a page we’ll create underneath the ‘Support’ menu highlighted in the screenshot below.
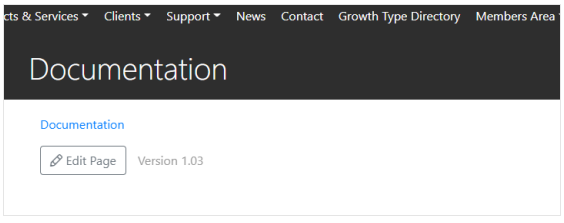
- Now we need to create a page to link to all the documents. In this instance the page is ‘Documentation’, and we will then add it to the ‘Support’ menu. Go to Settings > Pages in the main navigation and click the + Add Page button at the top.
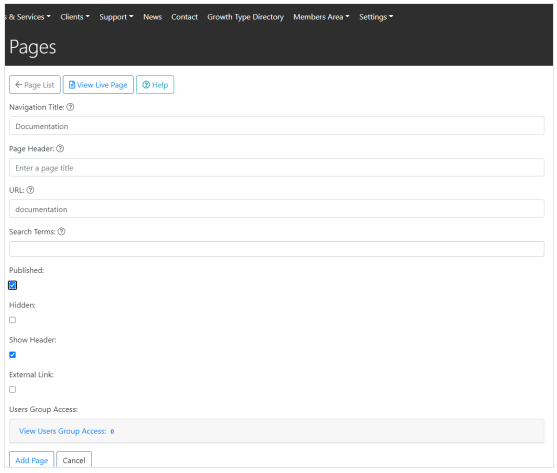
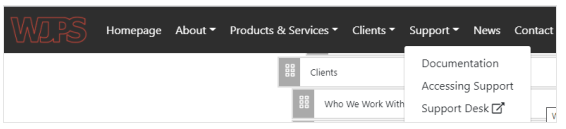
Above are the settings for our example, which we now need to add underneath the ‘Support’ menu in our site navigation (as shown below).

This will then show under our ‘Support’ menu like this:
- Now we can add our files to this ‘Documentation’ page if we edit it in the page editor. Select the option ‘Folder Link’ in the page editor’s ‘Content’ box:

We can then select the document folder that we want to make available to our users (in our case the ‘Documentation’ folder).
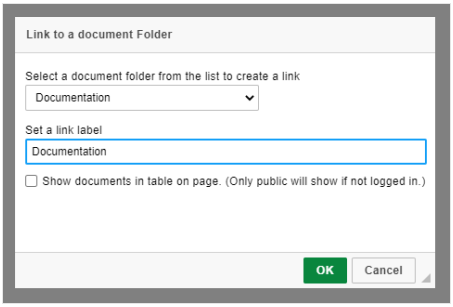
By default, this will be in the form of a link on the page, which will go directly to the folder in the ‘Documents’ section, and look like the below if you save the page:
Note: that this link will only work for registered users with the appropriate permissions
If you want the documents to be available to the general public, you can tick the ‘Show documents in table on page’ option instead, and they will be placed on the page directly, ready for download as shown below.
This method has a further advantage in that any documents you add to this folder in the future will be automatically added to this list.
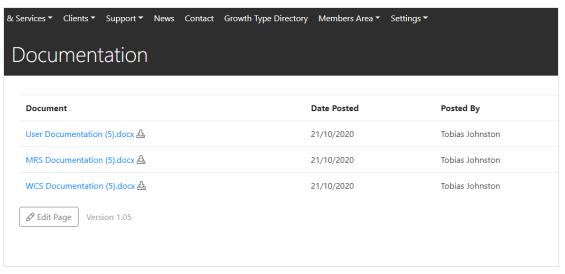
Note: that the documents MUST be set as ‘Public’ when added, otherwise they will not appear here for users who do not have a login for this site.
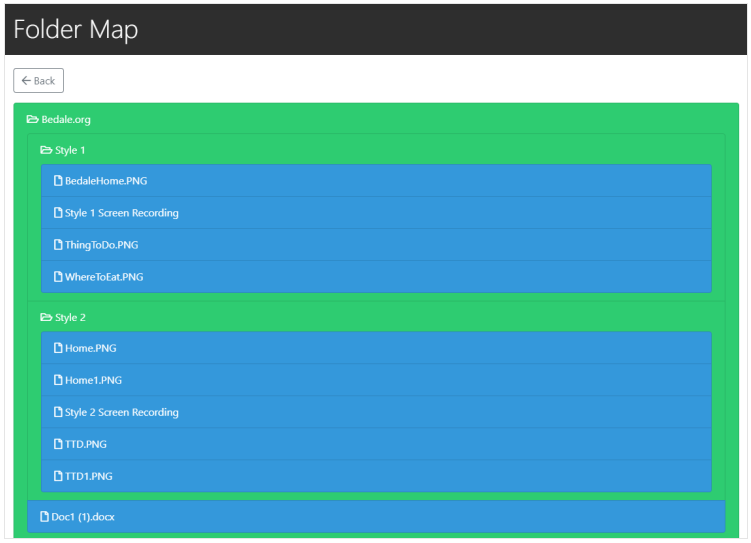
¶ Folder Map
The Folder Map will show the complete tree structure of the documents and folders on your website.
It can be accessed via the Documents section, by clicking the View Folder Map Button  which is only visible on the very top folder in your structure:
Folders are represented in Green, whilst Files are represented in Blue.
¶ Moving Documents & Folders
When your folders are set up and have documents in them they can easily be moved to enable you to keep things in the order that you require and enable you to order your documents how you wish.
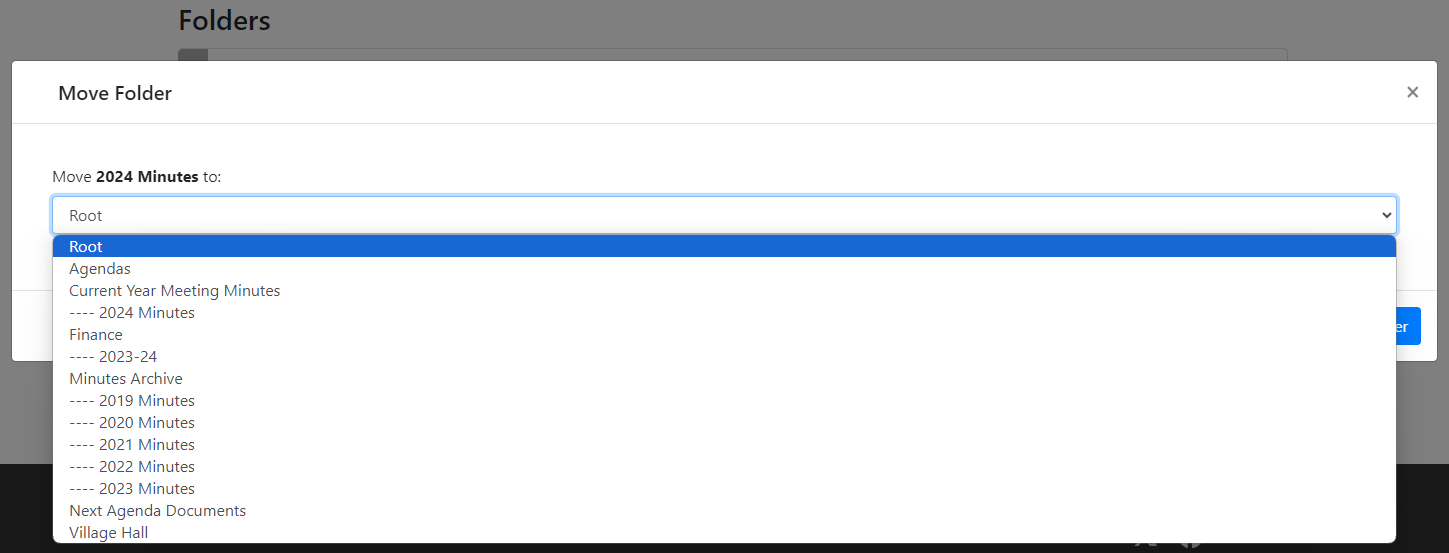
¶ Moving Folders
Much the same as on your computer folders can be moved to a different location. This can be useful if you wish to keep certain folders displayed such as current years documents and when you enter a new year you can simply move the folder and create a new one for the current year.
To move a folder click on the cross icon with the four arrows on the foder you wish to move

When you click this button a dropdown menu will appear to allow you to select which folder you would like to move it to. If you then click the 'Move Folder' button it will move the folder into the folder you have selected.
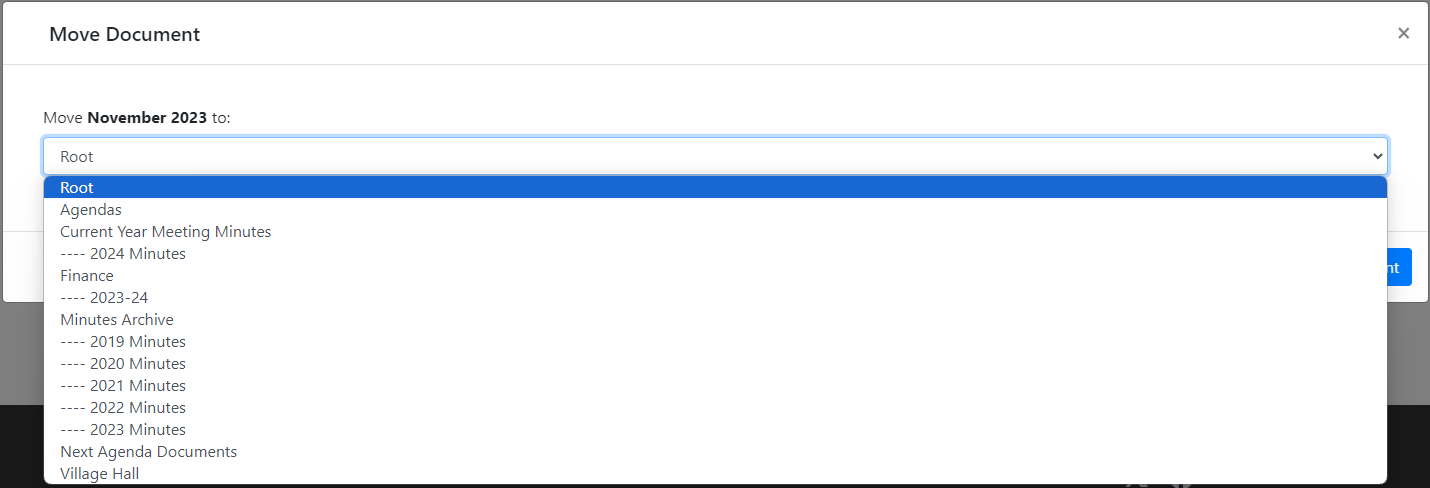
¶ Moving Documents
Moving documents works in just the same way as moving folders.
Clicking the move document button will bring up a list of folders where you can move the document to.