¶ Events
The Events page can be used to add and manage any events relevant to your organisation.
It can accessed through the Main Navigation Menu and clicking on Members Area > Events > Events
By default all of your organisation's Events will be shown in a list view, although this can be changed to a Calendar View (#2) which may be preferable for certain Users.
In the default table view any column marked with a Double Arrow icon  can be re-ordered by clicking the column title.
Columns that have been re-ordered will show in a darker Grey.
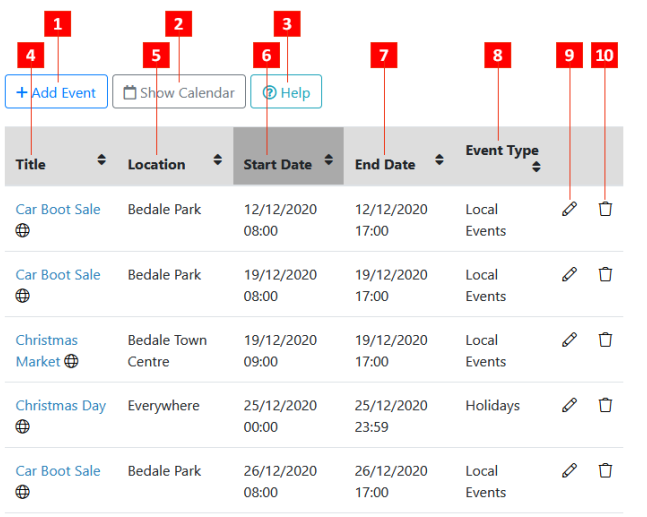
- Add Event: Add a new Event for your organisation. (See: Adding/Editing an Event )
- Show Calendar: Show the Calendar Event View instead of the default List View.
- Help: Access the relevant WCS Online Help section.
- Event Title: The name of the Event.
Event titles succeeded with a Globe icon are Publicly viewable Events and can be seen by non-members of your organisation if Events are added to a Public Page.
 - Event Location: Where the Event will take place.
- Start Date: The Date and Time that the Event will start.
- End Date: The Date and Time that the Event will end.
- Event Type: The category that the Event falls under.
- Edit Event: Amend the details of an Event.
- Delete Event: Delete the Event from the system.
¶ Calendar View
In addition to the default list view, The Events feature in WCS also includes an intuitive Calendar-style view.
This can be accessed from the *Main Event View, and then clicking the Show Calendar button 

- Add Event: Add a new Event for your organisation. (See: Adding/Editing an Event)
- Show List: Reverts back to the default 'List' view for Events.
- Days of the Month: Shows the days of the current month. Other months can be viewed by clicking the back (<) and forward (>) arrows on either side of the Month name.
- Currently Selected Day: The currently selected day is highlighted in Black. Days on which events occur are highlighted in Grey and outlined in the Event Type Colour (See: Event Types).
- Selected Day Event Info: Displays the Event information for the currently selected day in the Calendar.
- Event Types View: Choose which Event Types to display. Any types that are deselected will not be shown on the Calendar and their details will be hidden from view.
- Monthly Events: Shows all of the Events with the selected Event Types that are occurring within the currently selected month.
¶ Adding / Editing an Event
New Events can be added through the main Events Page, or the alternate Calendar View.
-
Go to either of the above sections and click the Add Event button
 .
. -
Enter the details of the new Event in the form:
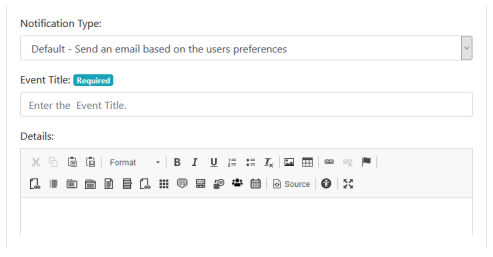
Notification Type
Select the type of notification that relevant Users will receive when this event is added.
Event Title
The title for the Event, as it will show in the List and Calendar views.
Details
Enter more detailed information about the Event.
Location
The location at which the Event will take place.
Start Date
The date and time that Event will start.
End Date
The date and time that Event will end.
Public
Check this box if the the general Public are allowed to view the details of this Event. If Events are added to a Public page, this information will show if this box is checked.
Repeat
Check this box is the Event will reoccur.
Once checked, further fields will appear:
Repeat Interval: This is the number of days between the Events.
Repeat Amount: How many times the Event will be repeated.
This will then add a separate event for each reoccurrence.
Users Group Category
Check the User Groups who will be able to see the details of this Event. If the earlier 'Public' option is checked, it will be visible to all regardless.
- Click on the Add Event button
 at the bottom of the form.
The Event should then be visible in both the List and Calendar views.
¶ Adding Events to a Page
Details of Events can be added to any User-Created page on your site using the Content Editor.
-
Go to the Page Hierarchy Editor and access the Page Editor of the Page you wish to add Event Details to.
-
In the Content Editor, select the Add Events button
 .
. -
In the window that appears, select a display option
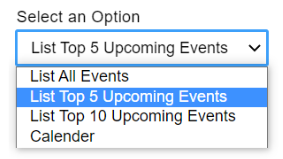
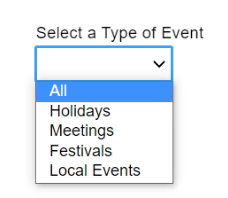
- Select which types of Events to show (See: Event Types)
Click the OK button  at the bottom of the pop-up window.
A code will appear in the Content Editor. Click the Save Page button  and then click View Live Page button
  and your Events display should be visible:
¶ Event Types
Events can be categorised into Event Types.
These types are used in several areas of your website, such as in the Events Calendar view - you can choose to show or hide Events that come under a certain type, and also when Events are Added to a Page, you can choose the types of Events to be shown.
These Event Types are Managed in the Event Types Manager, which can be accessed via the Main Navigation Menu by clicking on Members Section > Events > Event Types
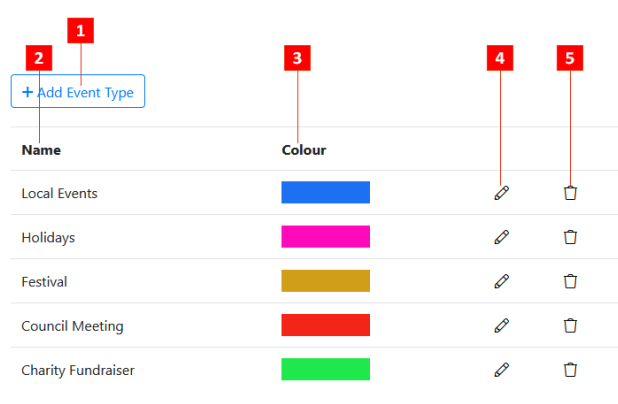
- Add Event Type: Add a new Event Type to the list. (See: Adding an Event Type)
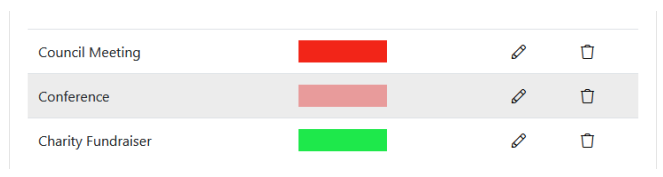
- Event Type Name: The names of the listed Event Types/
- Event Type Colour: The Event Type's colour. This is shown in the calendar view as a circle around the day on which Events of this type occur.
- Edit Event Type: Amend the details of the selected Event Type.
- Delete Event Type: Deletes the selected Event Type
¶ Adding an Event Type
Event Types can be added using the Event Type Manager.
-
From the Event Type Manager click on the + Add Event Type button
 .
. -
Fill in the details of the new Event Type on the form
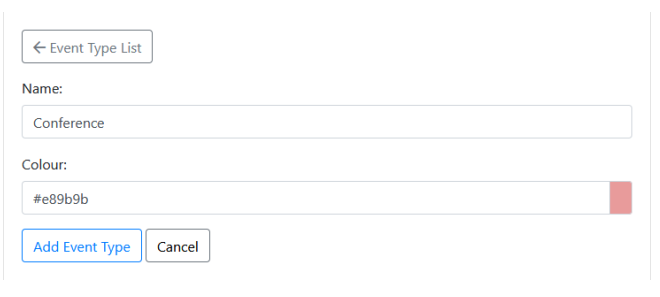
Name:
The name of the Event Type as it will appear in the Calendar and List views.
Colour:
The colour associated with this Event Type. It will be used to denote days on which Events have this type occur in Calendar view.
- Click the Add Event Type button
 and your new Event Type should appear in the Event Types Manager.