¶ Page Add-Ons
Page Add-Ons are small, reusable chunks of content that can be easily added to Pages on your website with just a few clicks.
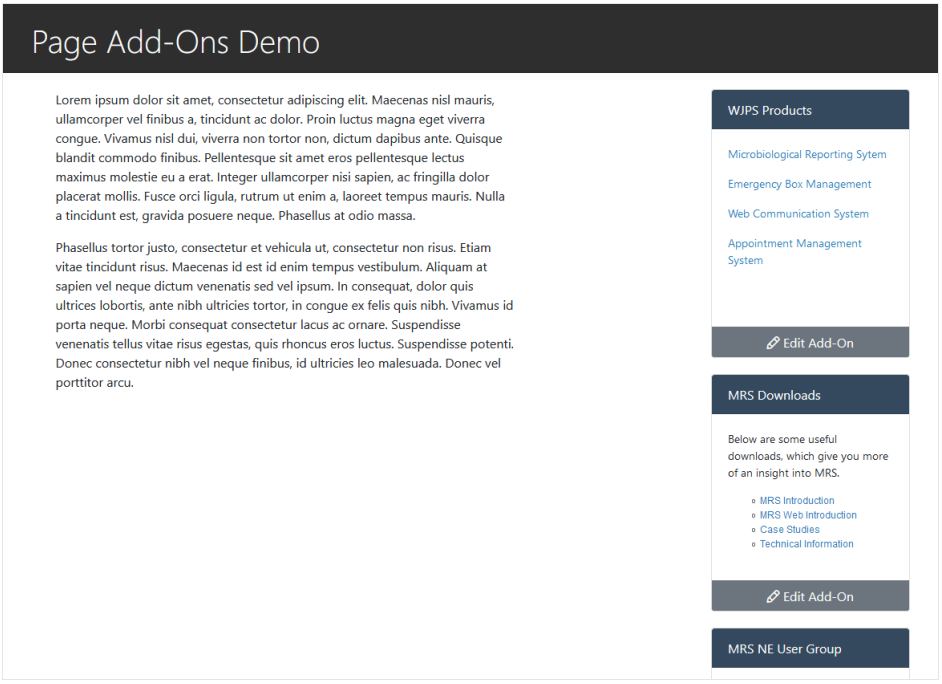
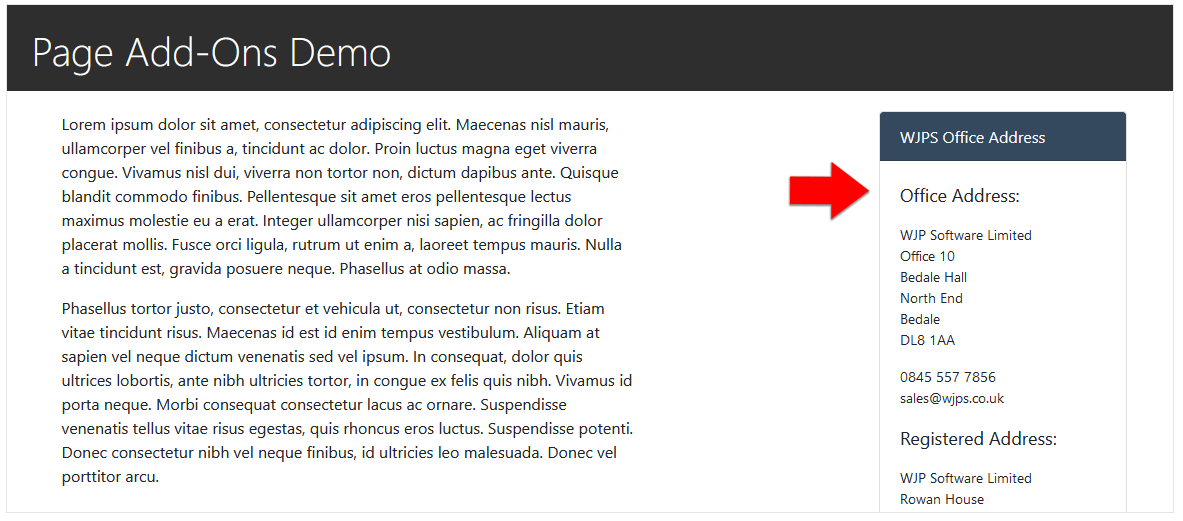
One use-case could be adding your organisation's contact details to several pages. Ordinarily this would be a tedious process, retyping or copy/pasting the information on each page, but if this information is instead written into a Page-Add-On, it can be added once, and then displayed neatly in a module, separated from your main page content.
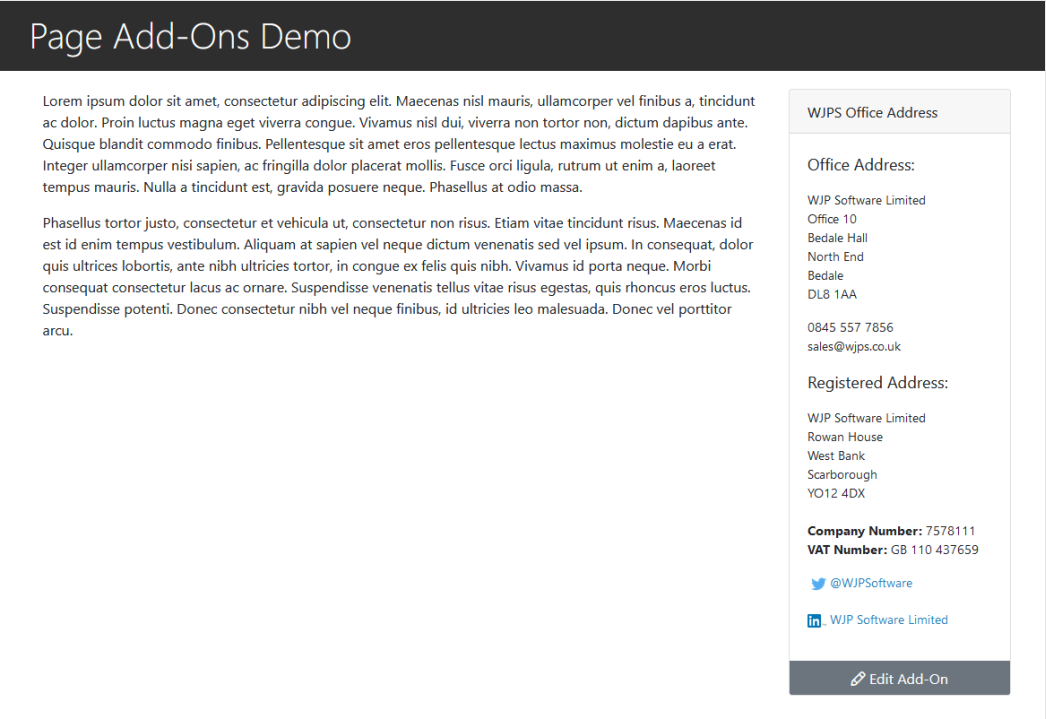
In the above example, the Page's main content sits on the left, whilst the Add-On content occupies its own space on the right.
The Edit Add-On button  will allow you to amend the content of the Add-On, and will affect all pages on which it appears.
¶ Page Add-On Manager
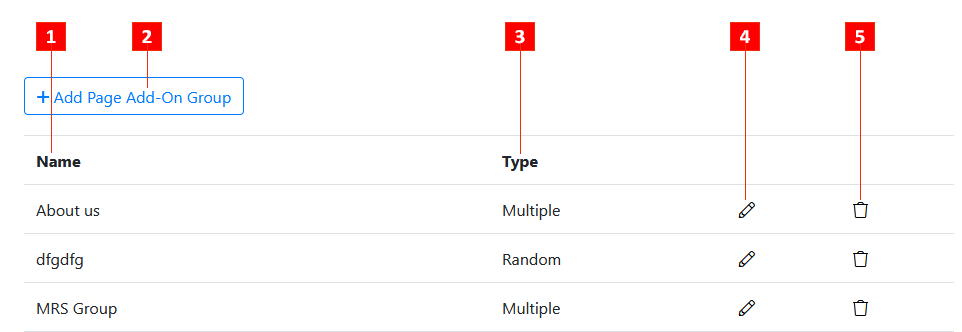
All Page Add-Ons are listed in the Page Add-On Manager.
It can be accessed through the Main Navigation Menu and clicking on Settings > Page Add-Ons > Add-Ons

- Add-On Title: The name of the Add-On. This can be amended in the Edit Add-On section (See: Adding a Page Add-On)
- Add Page-Add On: Click to enter the details of, and add, a new Page Add-On (See: Adding a Page Add-On)
- Add-On Group: Displays the name of the Group to which the Add-On is attached (See: Add-On Groups)
- Edit Add-On: Edit the details of the specified Add-On
- Delete Add-On: Deletes the specified Add-On.
¶ Adding a Page Add-On
-
Within the Page Add-On Manager, click on the + Add Page Add-On button
 above the list of current Add-Ons.
 -
On the following Page enter in the details of your Add-On:
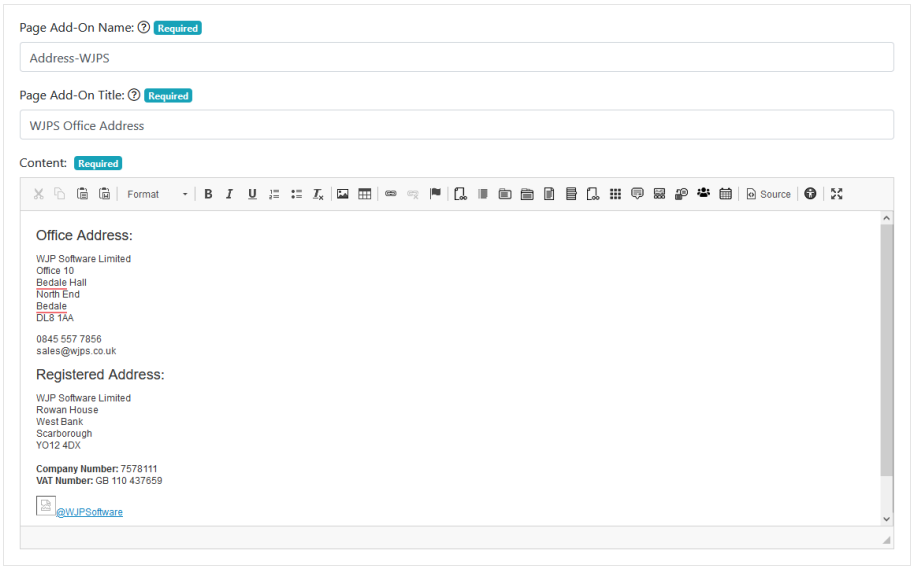
Page Add-On Name
The name of your Add-On as it will show within the Page Add-On Manager and any Admin-facing screens.
Page Add-On Title
The title of your Add-On, which will be displayed publically at the top of the module after adding it to a page:
Content
The content that you wish to display in your Add-On.
- Click the Add Page Add-On button
 .
.
You should see a message confirming your Add-On has been added, and it should now be visible in the Page Add-On Manager. and can be added to a Page (See: Adding a Page Add-On to a Page)
¶ Adding a Page Add-On to a Page
-
Before a Page Add-On can be added to a Page, it must first be added to the Page Add-On Manager (See: Adding a Page Add-On).
-
Once an Add-On has been created, go into the Page Content Editor of the page you'd like to add it to.
-
Scroll down to the field marked Page-Add-ons and select the one you'd like to add to the page from the dropdown list.
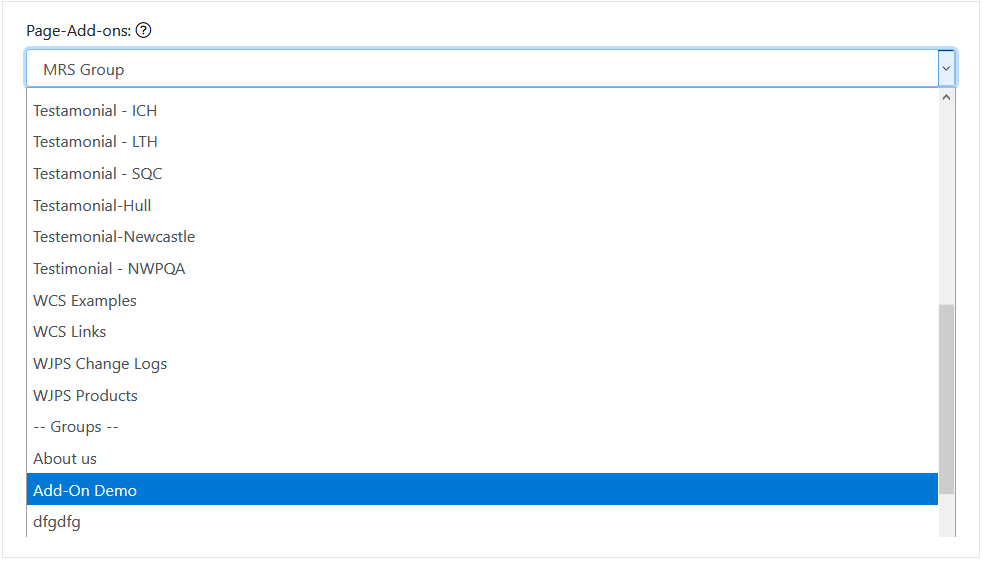
Note: Add-On Groups can also be added here by scrolling down until you see the --Add On Groups-- divider within the dropdown selector and selecting one of the Groups that appears below it.

-
Click the Save Page button

-
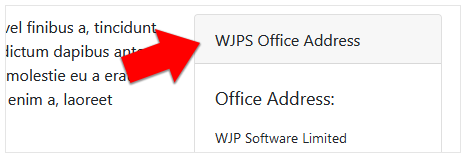
Your Page Add-On should now be visible if you visit the page:
¶ Add-On Groups
More than 1 Add-On can be added to a Page at a time by grouping them together. These groups are Managed in the Add-On Groups section.
This can be accessed from the Main Navigation Menu by clicking Settings > Page Add-Ons > Add-On Groups
- Add-On Group Name: The name of the Group as it will be displayed in the dropdown selector within the Page Content Editor
- Add Page Add-On Group: Click to enter the details of, and add, a new Page Add-On Group.
- Group Type: This will determine how the multiple Add Ons within the Group are displayed on the page:
Multiple: Displays all Add-Ons within the Group stacked one above another.
Random: This will randomly select a single Add-On from the Group to display.
This may be useful if you want to display testimonials. If you create a separate Add-On for each testimonial and add them to a Group set to 'Random' Type, it will randomly select one to display each time the page loads. - Edit Add-On Group: Edit the settings of the selected Add-On Group.
- Delete Add-On Group: Delete the selected Add-On Group.
¶ Creating an Add-On Group
-
Within the Add-On Groups Manager, click on the + Add Page Add-On Group button

-
On the following Page enter in the details of your Add-On Group:
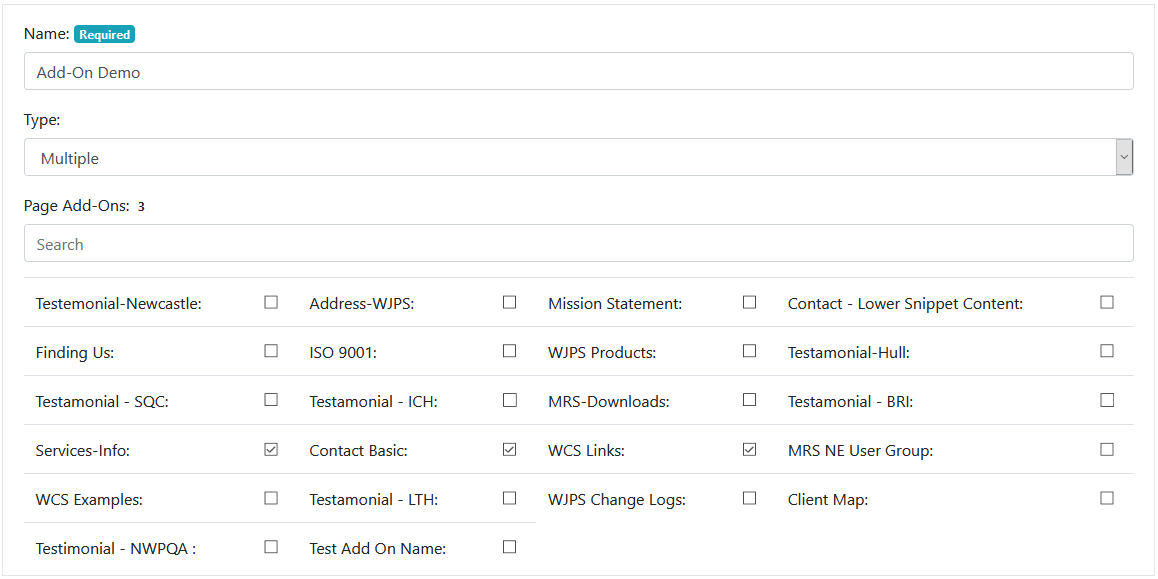
Name
The name of the Add-On Group. This will be displayed in the dropdown menu in the Page Content Editor when you select the Add-On to display.
Type
This will determine how the multiple Add Ons within the Group are displayed on the page:
Multiple: Displays all Add-Ons within the Group stacked one above another.
Random: This will randomly select a single Add-On from the Group to display.
This may be useful if you want to display testimonials. If you create a separate Add-On for each testimonial and add them to a Group set to 'Random' Type, it will randomly select one to display each time the page loads.
Page Add-Ons
Select which page Add-Ons you want to include in this Group.
- Click the Add Page Add-On Group button
 .
.
You should see a message confirming your Add-On has been added, and it should now be visible in the Add-On Groups Manager. and can be added to a Page (See: Adding an Add-On Group to a Page)
¶ Adding an Add-On Group to a Page
-
Before an Add-On Group can be added to a Page, it must first be added to the Add-On Group Manager (See: Creating an Add-On Group).
-
Once an Add-On Group has been created, go into the Page Content Editor of the page you'd like to add it to.
-
Scroll down to the field marked Page-Add-ons and in the dropdown Menu, scroll down until you pass the -- Groups -- divider which separates singular Add-Ons from Groups:
-
Click the Save Page button

-
Your Page Add-On Group should now be visible if you visit the page: