¶ Users
Users are an integral part of the way that the Web Communication System works.
Each user has their own unique account which can be customised to allow for a great deal of flexibility in the way that they experience your website.
For example, you may wish to restrict certain sections of your website to be accessible only by certain users in your organisation, or set sensitive documents to only be available to those authorised to view them.
This section will cover how users can be managed and assist with common tasks you may wish to accomplish.
¶ Logging in
The log in button is located on the right-hand side of the Main Navigation Menu.
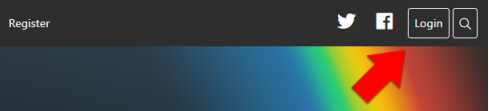
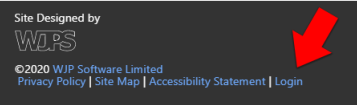
On some WCS sites the log in button is set to be more discreet, therefore is placed at the very bottom left of the website.
note- If you do not see the login option as pictured above, scroll down as far as you can, and you should see the option to login as shown below.
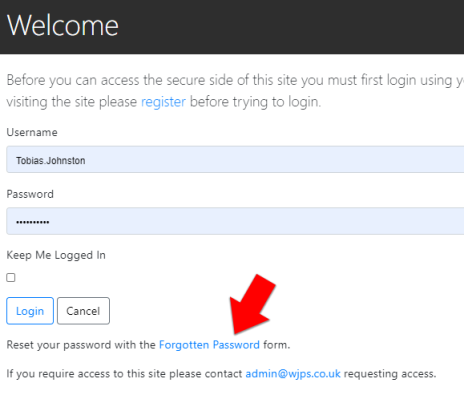
Clicking the login button will take you to a page containing the log in form. To log into the site, enter your username and password into the respective fields and click the 'Login' button.
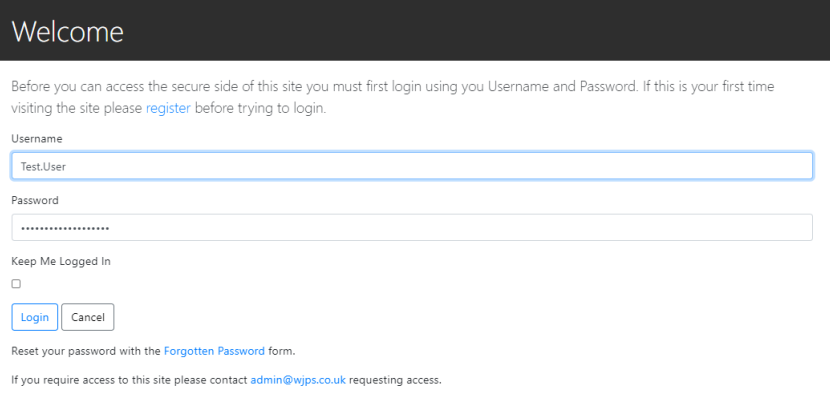
On this page you can also choose for the site to keep you logged in or not. If this button is checked you will stay logged in, even if you leave the website, and you will not have to re-login upon retrning.
Note: that this is time limited to an extent, and if enough time has elapsed, you will need to log in again when returning to the website
If you have forgotten your password, you will need to go through the Forgotten Password process before you can log in.
After you have logged in successfully you will be taken to the Welcome Page.
¶ Forgotten Password
If you are unable to remember your password, you can click the link on the login window called “Forgotten Password?”.
Once you have pressed the forgotton password button you will be prompted to enter the email address associated with your account and an email will be sent to you.
This will contain a link which you can then use to enter in a new password for future use.
¶ Changing your Password
It is recommended that you change your password on semi-regular basis to ensure it is secure as possible.
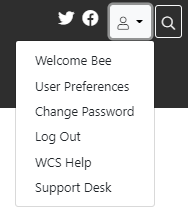
To do this, when logged in, you can change your password by clicking the 'User Account' icon ![]() , in the top right corner of the page, then selecting 'Change Password' from the drop down menu:
, in the top right corner of the page, then selecting 'Change Password' from the drop down menu:
On the 'Change Password' page, you will be prompted to enter your old password, before entering your new one twice to ensure it is correct.
note- Passwords must be at least 10 characters in length. Search online for best password practices for help on creating a secure password.
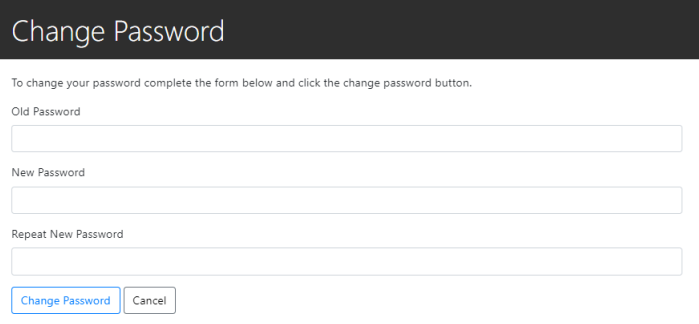
When you have done this click the 'Change Password' button and you should receive a success message indicating a successful change:

You will still stay logged in, however once you log out, on your next login attempt you will need to enter the new password.
¶ User Admin
The User Admin page is used to create and manage your website's user accounts.
It can be accessed via the Main Navigation Menu and selecting Settings > Users > User Admin.

This page displays a list of all accounts on the site including their full name, username, organisation and user level.
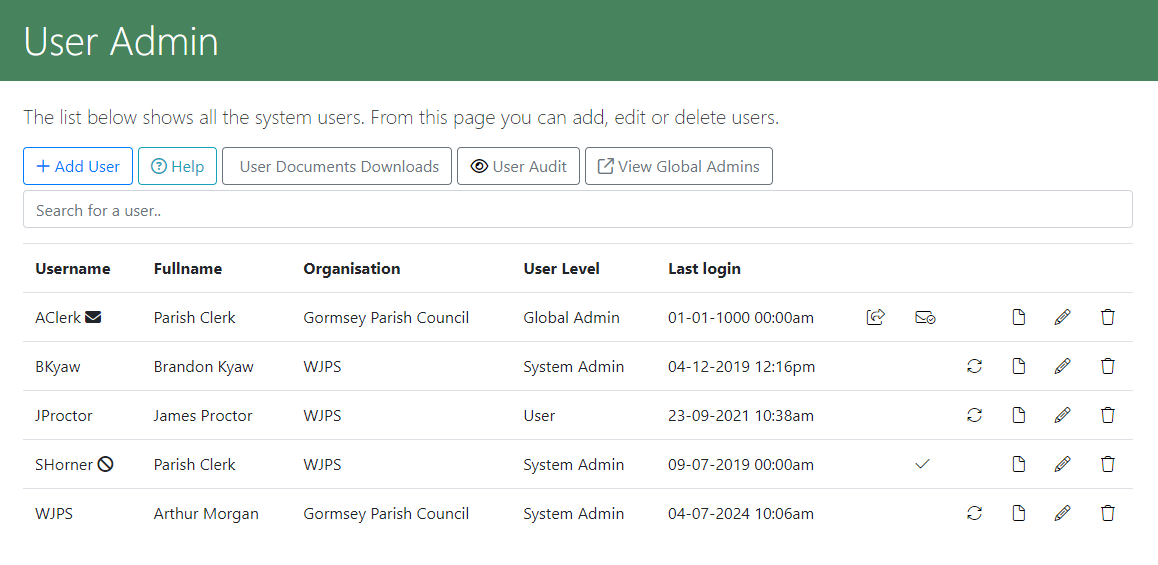
- Add User - Add a new user to your WCS site
- Help - Link to WCS Online Help
- User Documents Downloads - View how many times a document was downloaded and by whom
- User Audit - View a customisable timeline of all user activities
- View Global Admins - Displays a list of all users listed as 'Global Admins'. Can be exported to Excel format.
Search for a user - A user search that updates instantly as you type. Username, Fullname, Organisation, User Level and Trusts are all searchable fields. - Username - The usernames for all of your site's users. This is the name they will enter in the Login section.
A mail icon after a username, indicates that this user has not yet confirmed their email address, and their account will not be usable until they have done so.
A ban icon after a username, indicates that this user is not enabled, and you would need to click the check mark
  to enable their account and allow them to log in.
 - Full name - The user's full name
- Organisation - Displays the organisation that the user belongs to.
- User Level - Displays the user's User Level which determines which parts of the site they can access, and which actions they can perform.
- Trusts (NHS Only Feature) Displays the NHS Trust that the user belongs to.
- Last Login - Displays the time and date of the user's last successful login
- Resend activation email - If a user has not received an email to activate their account, you can resend it using this button
- Manually Activate User Account - If a user has not activated their account then clicking on the will manually activate their account and they will just receive an email to set their password.
- Enable User - If a user is inactive, clicking this checkmark will activate their account and allow them log in
- Viewed Documents - Displays a list of all documents the user has downloaded and how many times they downloaded them.
- Reset Password - Resets a user's password and sends them an email with a link to enter a new one.
- Edit User - Edit a user's details (Note however that you cannot change their username)
- Delete User - Deletes a user from the site. They will no longer be able to log in.
¶ Creating and Editing Users
To create a new user account, in the User Admin Panel, select the button titled Add New User located above the list of users.

You will then be asked to fill in the details of the new user:
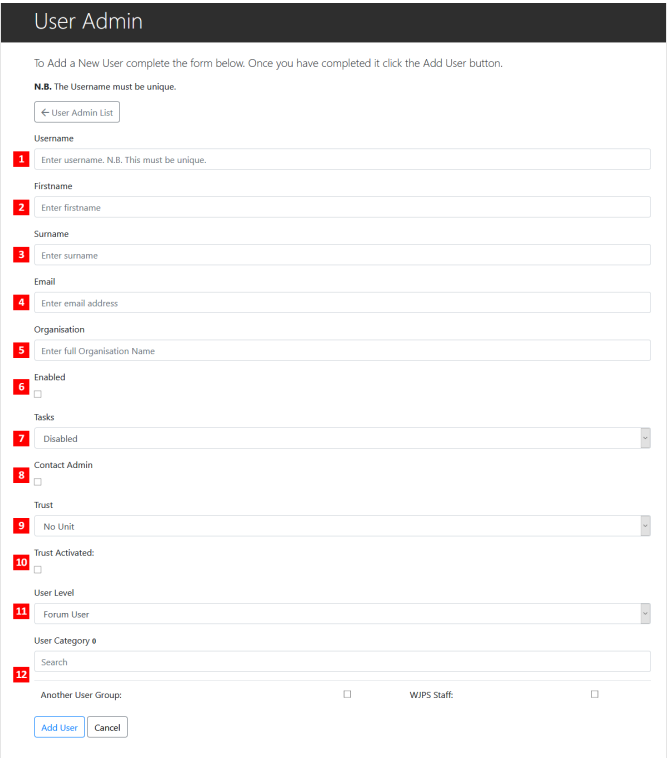
- Username - The username that the user will type in, along with their password in order to log in to the website.
- First Name - The user's first name
- Surname - The user's surname
- Email - The user's email associated with the account. All email communication from the website to this user will be sent to this address.
- Organisation - The Organisation to which this user belongs
- Enabled - If unticked, this account will not be active, and the user will not be able to log in until you enable the account via the User Admin panel.
- Tasks - If set to Enabled, the user will be able to have Tasks assigned for them by a Task Admin. If set to 'Task Admin', the user will be able to create and assign tasks to other users.
- Contact Admin - If enabled, the user will have access to view and mark as 'complete' any communications submitted through your website's Contact Form.
- Trust (NHS Only) - The NHS trust the user should be assigned to.
- Trust Activated (NHS Only) -
- User Level - Sets which User Level this user should be assigned to. This will affect what actions they can perform on the website.
- User Category - Sets which User Category this user should be assigned to. This is similar to User Level, and will affect their level of access to restricted documents and certain sections of the site.
¶ User Groups Admin
Groups are useful for categorising users into groups to control what certain groups of users can access. A user can be part of one, or multiple groups.
The User Groups Manager is used to manage and edit existing user groups.
It can be accessed via the Main Navigation Menu and selecting Settings > Users > User Group Admin
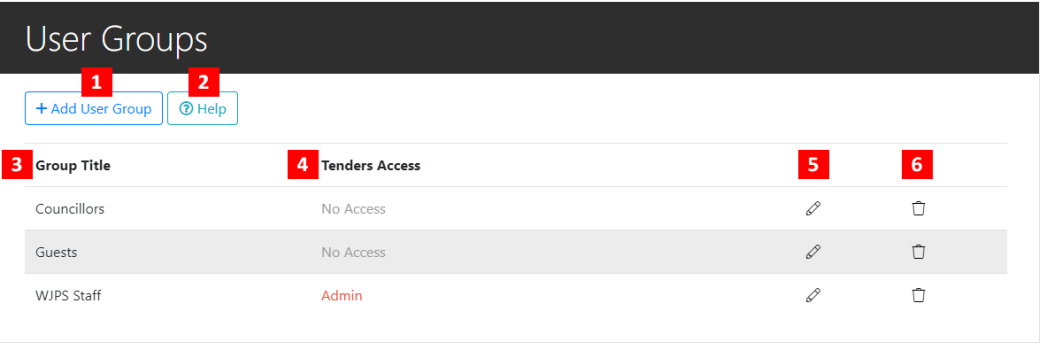
- Add User Group: Create a new User Group.
- Help: Access WCS Web Help.
- Group Title: The name given to the group of users.
- Access to special features: Shows whether the group has access to any of WCS's specialist features - in this instance the 'Tenders' section is active, although different installations of WCS may have others available.
- Edit User Group: Edit the details of the User Group including the Group Title, Access to special features, and the users assigned to the group.
- Delete User Group: Deletes the User Group.
¶ Adding / Editing a User Group
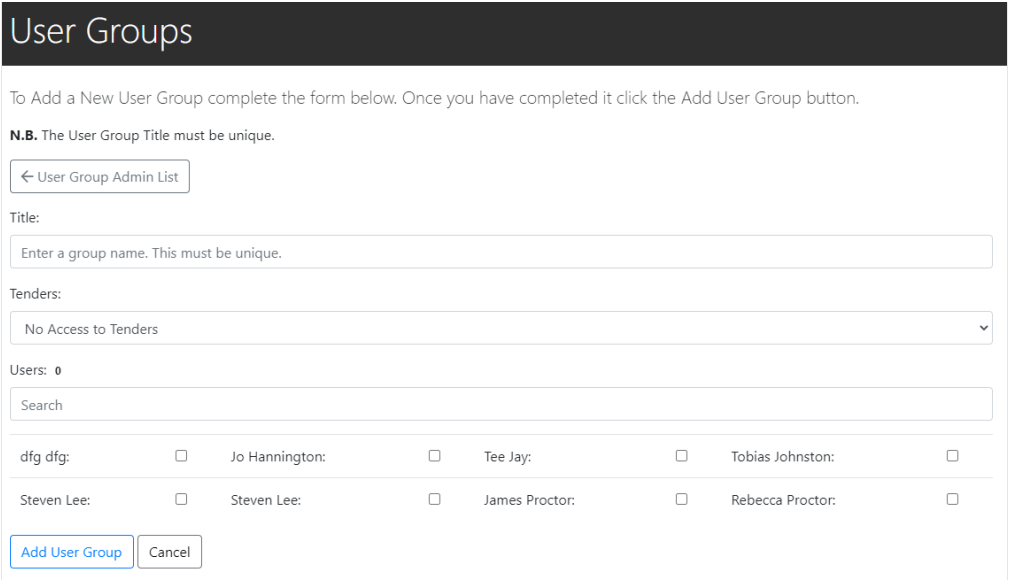
Adding a new User Group is done from the User Groups Admin page.
Click the 'Add User Group' button  above the list of existing groups, and this will open a page where you can enter in the details of the new group.
Note: You can also add Users to a Group individually via the Edit User page within the main User Admin.
-
Title -Enter a name that describes your group of users.
-
Tenders - What level of access should users in this group have to the 'Tenders' section?
You can select whether they have no access, are only able to view Tenders, or if they have full Admin access and can also create them.
Note: The Tenders section is a special feature of WCS that may not be activated on your site so this option may not be visible.
Your installation may also have additional special features that show up here, whose -
Users -This is where you assign users to your group. A list is shown below, simply tick the checkbox of each user you would like adding to the group.
Depending on how many users your site has, you may find it useful to use the search box above this list, in order to find a particular user.
Once you have completed the fields, click on the Add User Group button below, and you will see a confirmation that your group has been created.
¶ Public User Registration
Please Note: This is an optional feture and may need to be activated by WJP Software. If you do not see it on your site but wish to add it, please contact [email protected] to arrange instillation.
The 'Public User Registration' feature allows members of the public to register on your WCS site. If activated, a 'Register' option will appear in the Main Navigation Menu:

- Once a user has registered, their account must be activated by a Site Administrator before they can successfully log in.
New user accounts can be enabled in the User Admin section, and are easily identified by the tag underneath their Username:
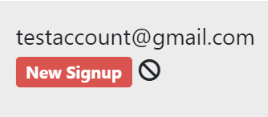
- The account can then be activated by clicking the checkmark near the other controls on the right-hand side of their user entry:
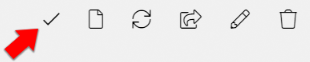
Public users registering through this process will automatically be added to a 'Users' User Group, with limited permissions.
¶ Resetting a Users Password
Users with Administrator privileges can reset any User's password through the User Admin section.
- Find the User whose password you wish to reset in the Users Table

-
In the actions menu on the right-hand side, click the Reset Password icon
 and select 'OK' in the confirmation dialogue that appears.
 -
You should then see a confirmation of a successful reset above the User Admin section:

The user will be emailed the listed link to the email address registered with their account, which they can use to reset their password to one of their choosing.
If the user does not have access to their associated email, you may choose to copy and send them the link via another method so that they can still reset their password and log-in.
If using this method, please verify their request is legitimate before doing this.
¶ Email All Users
If you have an urgent message you need to send to all of your registered users, it is possible to send an email message to all of them through your WCS site.
-
From the Main Navigation Menu, click on Settings > Users > Email All
-
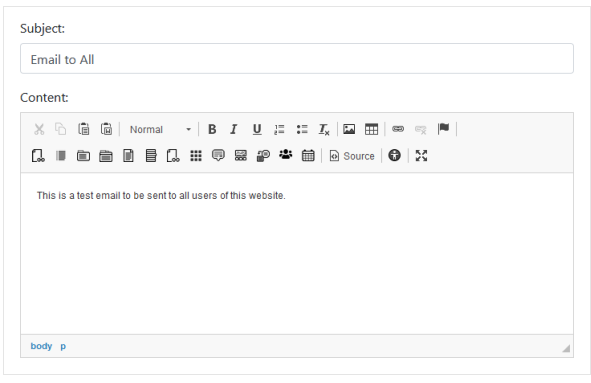
Fill out the Email Subject and the Content of the email you'd like to send.
-
Click the Send to all Users button
 at the bottom of the form.
 -
You should see a message indicating your emails are being sent.
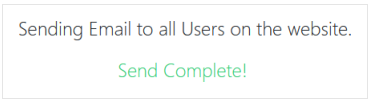
Note: If your site has many users, this process may take some time. 'Send Complete!' will show when the process has finished.
Note: Subscribers to your Site's News Mailouts are separate to your site's main users, so this process will not send to them unless they have also registered with your site and are visible in the User Admin section.
¶ Setting Email Preferences
Your WCS site can send you email notifications from many of it's built in features when something new is added, or when an item may demand your attention.
You may however, wish to be only notified of certain things, or have multiple notifications grouped together in Daily/Weekly digests to prevent becoming overwhelmed.
-
You can control these email preferences by clicking the User Profile icon in the top-right of the Main Navigation Menu, and selecting the User Preferences option within the menu.
-
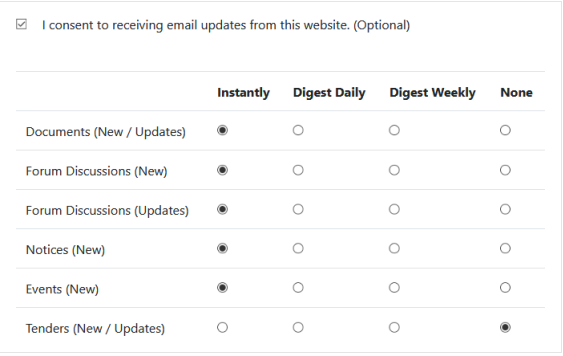
This will bring up the User Preferences panel:
-
I consent to receiving email updates from this website- If unticked you will receive no emails from WCS at all, irregardless of your settings in the below table.
-
Instantly- As soon as an action occurs in the specified section, you will be sent an email about it.
-
Digest Daily- The days actions in the specified section are collected together and a single email will be sent to you once a day.
-
Digest Weekly- The weeks actions in the specified section are collected together and a single email will be sent to you once a week.
-
None- You will receive no emails for any actions that occur in the specified section.
- When you have finished inputting your preferences, click the Save button
 to finish and save the changes.
¶ Welcome Page
The Welcome Page is shown when a user logs in via the Login option within the Main Navigation Menu, or through the option at the very bottom of the page if the Discreet Login option is checked in Site Settings.
It can also be accessed at any time by clicking the User Profile button located to the far right-hand side of the Main Navigation menu at the top of the page and selecting the Welcome {Your First Name} menu item.
There are two main sections to the Welcome Page:
- The User Welcome section, which allows all Users to view a customised Welcome Page message, and any updates since they last visited the site.

- The Admin Tools section, which is only visible to Site Administrators, and displays below the User-Facing section.
This allows Admins to quickly approve new Users and view site statistics.
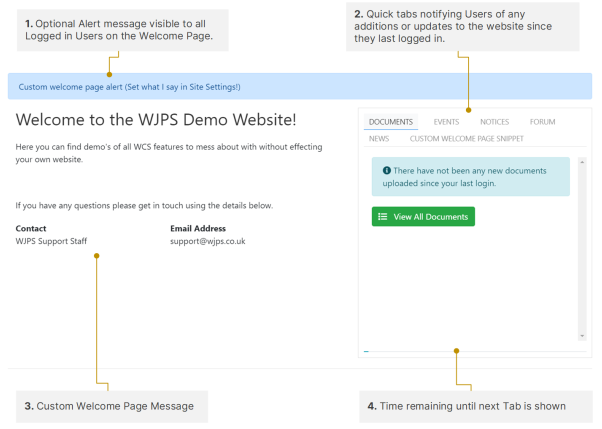
¶ User Welcome Section
This section of the Welcome Page is visible to all Users after logging in.
-
Optional Alert Message: This is an optional and customisable alert message that will appear to all users and is useful if there is any urgent information that you need them to know.
It's content and colour can be edited through the 'Site Setup' section. -
Quick Tab Menu: These tabs will show any changes or new content in the listed sections since a Users last successful login. The number of new items will display in a Red bubble, next to the relevant section.
The sections available for Users here can be customised within the Site Setup section, and set to display either All their Items, or only those that have changed since the User last logged in. -
Custom Welcome Page Message: This content will be displayed to all Users upon logging in, and can be used to show details relevant to your organisation.
Its content can be customised by using the Content Editor accessed through clicking the 'Edit Welcome Page Blurb' button at the very bottom of the page.
 -
Time Remaining Until Next Tab: Unless your mouse cursor is hovering directly over this window, this display will cycle through each of the listed tabs every 30 seconds, the progress of which is represented by this progress bar at the bottom of the display.
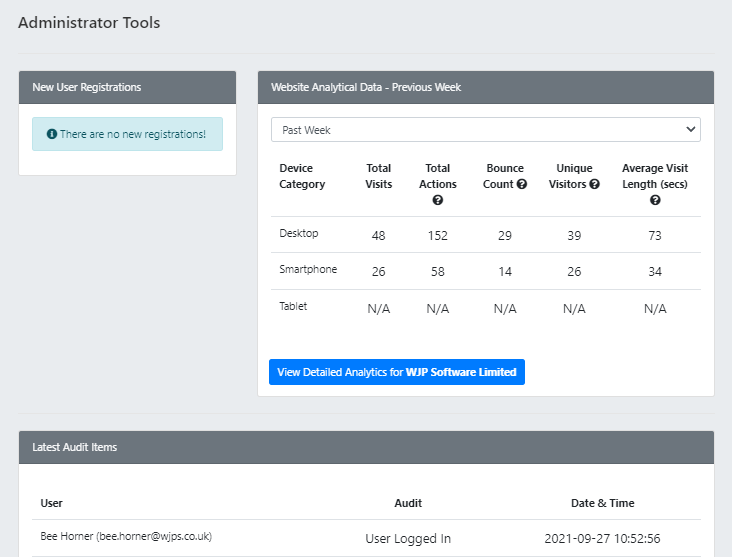
¶ Admin Tools Section
This section of the Welcome page is visible to Site Administrators only, and allows them to view pertinent site-related information at a glance.

-
New User Registrations: Any User Registrations pending approval will show up here.
Clicking the User will link to the User Edit page, where the 'Enabled' flag can be checked to activate them.
Alternatively, the request can be deleted right from this Admin section, by clicking the 'Delete Request' button. -
Visitor Data: This section shows historic visitor data for a given time period on both Desktop and Mobile devices.
The time period can be changed using the dropdown menu within the component. -
Audit Log: The last 10 items from the User Audit Log will be displayed here for informational purposes.
-
Edit Welcome Page Blurb: The introductory message displayed to all logged-in Users can be edited using this link.
-
WCS Information: Information related to the current installation of WCS.
¶ Editing the Welcome Page
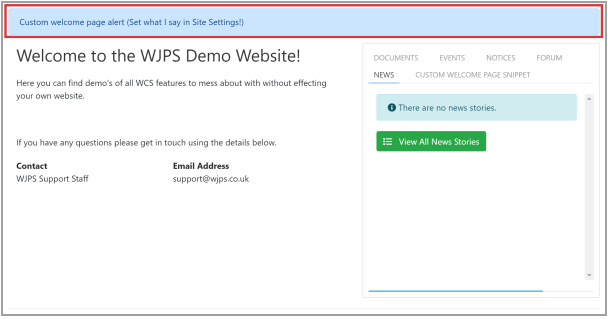
The introductory Welcome Page content (outlined in Red in the screenshot below) can be edited to suit your organisation.
Only users with appropriate Global Admin permissions can edit the content.

The content can be edited in a similar fashion to regular pages:
-
At the bottom of the Welcome page click on the 'Edit Welcome Page Blurb' button
(visible to Global Admin Users only). -
Enter in your Welcome Page content into the Content Editor.
-
Click the 'Save Welcome Page' button
 below, to save your changes and go back to viewing the Welcome Page.
 -
Your newly added/edited content should now appear.
¶ Adding an Alert to the Welcome Page
On your organisations Welcome Page you may wish to highlight critical information to any of your logged-in Users.
An optional Alert message can be added above the Welcome Page* to achieve this (outlined in Red in the below screenshot):
-
Logged in with an account with Global Admin privileges, go to 'Settings > Site Setup' in the Main Navigation Menu
-
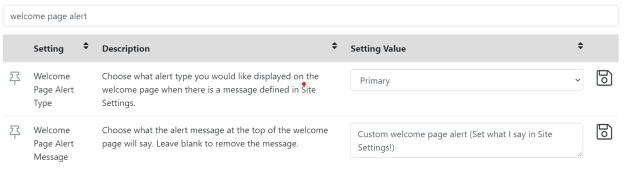
Type 'Welcome Page Alert' into the text box above the various settings to search for the relevant settings.
-
In the 'Welcome Page Alert Type' setting, select the type of alert that you would like to display.
This primarily affects the colour - Primary will display as Blue, Success as Green, Danger as Red .etc -
Click the adjacent 'Save Setting' icon

-
In the 'Welcome Page Alert Message' setting, type in the message you would like to display (or leave blank to avoid showing an alert message entirely).
-
Click the adjacent 'Save Setting' icon
-
Go back to the Welcome Page by clicking the User Profile button
 in the Main Navigation Menu, and select the 'Welcome {Your First Name}' option and you should see the Alert displaying (or not) as you have set it.